Saturday, 14 September 2013

Garden Labels: Ceramic Plant Markers


Talking of gardens...! My last blog post was all about my wild flower meadow garden. But I forgot to mention I also grew a few herbs this summer too: some thyme, lavender, mint and marjoram. These I grouped together in pots on the patio. As I was planting them out it crossed my mind that the perfect finishing touch to set them off would be some plant name tags. And this inspired me to make a set of ceramic herb markers - an obvious idea really!

As you can see, they're a simple rustic design. I made them using stoneware clay and some letterpress stamps which I pressed into the clay when still soft. I selected ten of the most common garden herbs and used a plain white glaze to highlight the lettering. They should be quite hard-wearing even in cold weather - and reusable of course. And they look so pretty against different shades of green foliage. 

You can see a listing for these markers in my Etsy shop. I'm hoping a few gardeners will like them, and I think they make a lovely gift set too. I'm planning to make more markers with the names of popular vegetables and summer salads on them as well. All of this is probably a bit summery just as autumn comes around the corner. But autumn is also a time for shed-clearing, seed-buying, tool-cleaning and general garden planning of next year's crop - so I'm just way ahead of myself for once!

Thursday, 15 August 2013

Wild Flower Meadow Garden: for the Bees!

Cornflower

Today I thought I'd show off some photos of my summer garden. I don't normally go off-topic on this blog and although it has nothing to do with pots or painting, I've been so pleased with our garden this year I just had to share the results. Shockingly, I also realised I haven't blogged at all throughout the whole of July: so I hope these photos of last month's garden display will make up for that.

In the past five or six years ceramics have taken over most areas of my life: and one of these areas has been the garden. Long ago, before any kilns were installed or bags of clay took up space in corners, I was growing some vegetables and summer salads in my garden, happily pulling up some decent sized parsnips and even having a few successes with mushrooms or the odd little chili plant. But all this greenery requires a lot of attention, weeding and watering which in the end had to go by the wayside in favour of making pots. Pots are very demanding things!

Busy Bees!

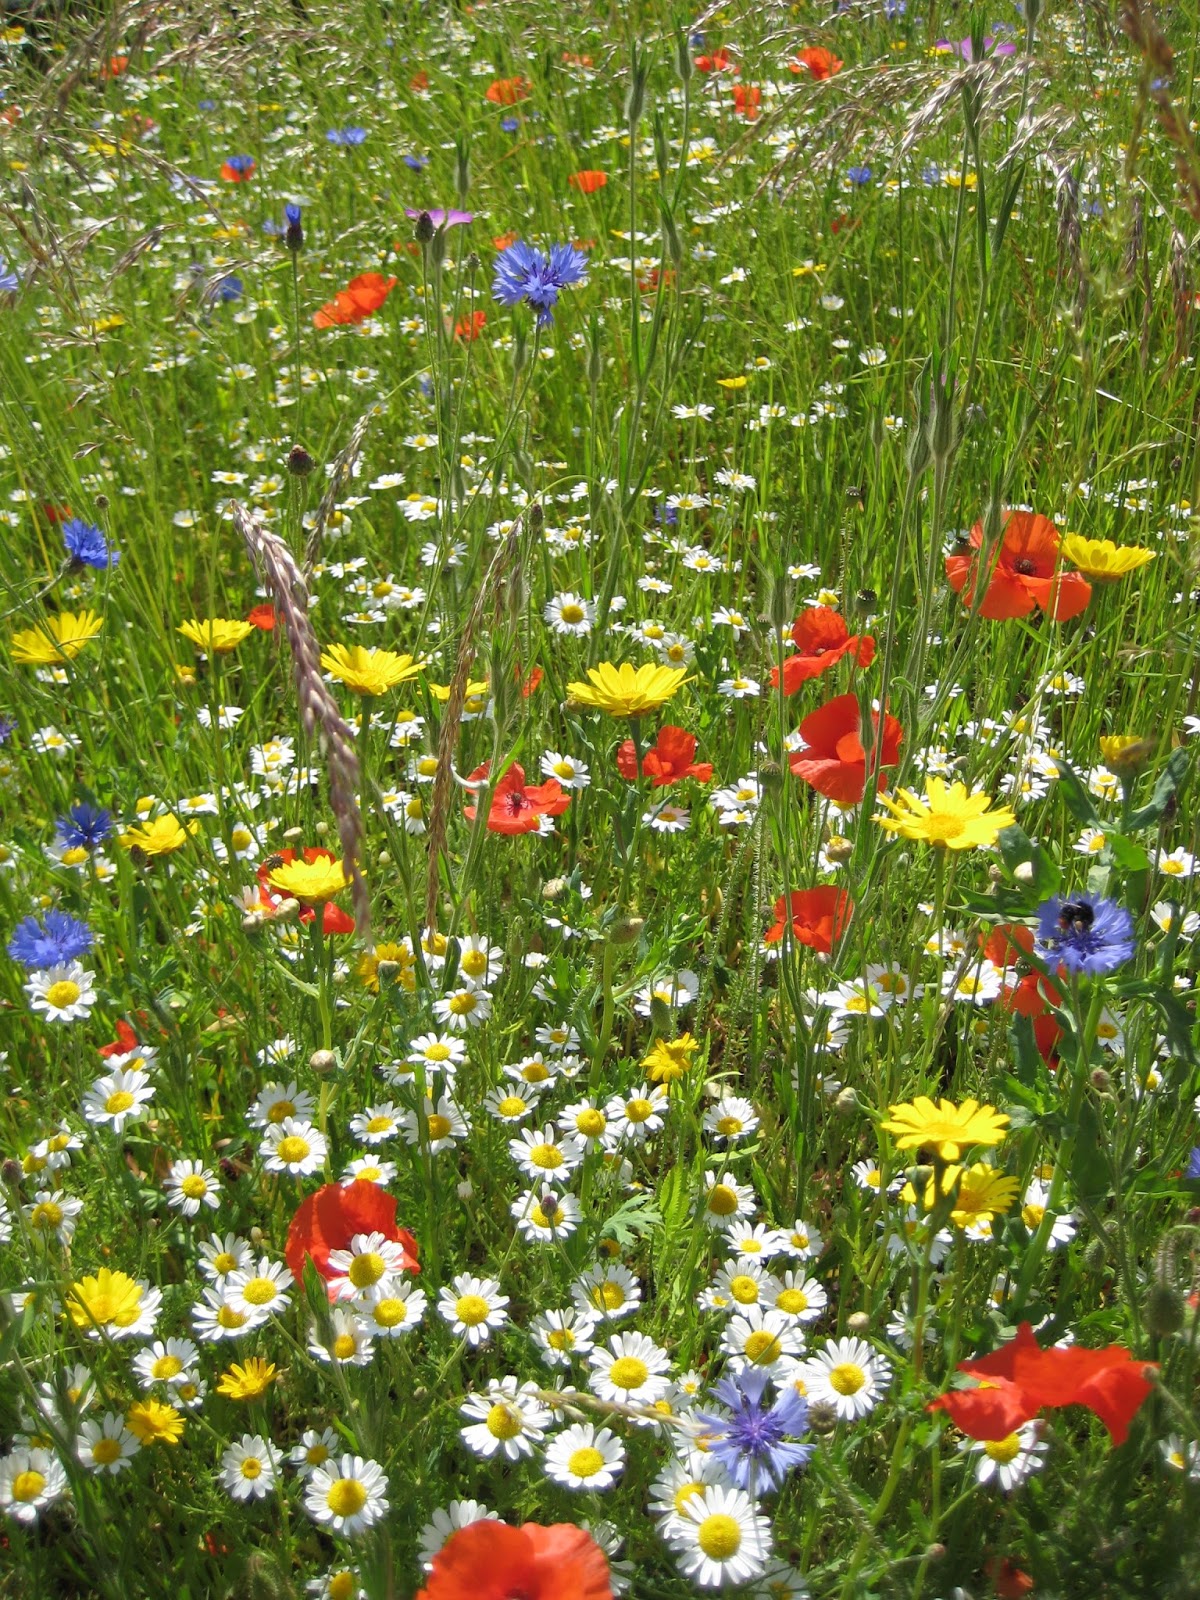
By the end of last year the garden had fallen into serious 'disrepair' to the point that one day (inspired by the thought of some exercise) IC decided to pull up every single plant and thoroughly dig over the entire ground. The plan was to have a very low maintenance garden that needed no work at all but which still looked good. So we decided to plant a meadow full of wild flowers especially for all the bees.


Corn Marigolds and Corncockles

This was incredibly easy to do! In fact, once the ground was cleared and most of the weeds pulled up, all that remained was to rake it over a bit and sow the seeds. I purchased the seeds from an Internet site that provides wild flower meadow seed mixes. I chose two mixes full of native plants suitable for all-summer colour and perfect for bees and butterflies. Not all the species made it through to flowering, and probably our original 'home grown' grasses bullied some of them out of a space altogether. But bearing in mind how little preparation we made and how casually I cast the seeds (from a bucket one afternoon in April just before a downpour) I have to say it has been absolutely fabulous.

Secretly I feel it's been our best garden so far - even better than when we grew vegetables. During the whole of the summer drought I didn't have to water any of it, it looked fantastic for weeks, it changed constantly with different species coming through daily and best of all it was full of busy bees!

Corncockle with Corn Poppies in the Background

Here's a link to the site where I bought the seeds by the way. And although I've said this blog post has nothing to do with pots or painting, I have a feeling that this year's garden has already had an influence on me and inspired some creative ideas.


Friday, 28 June 2013

Pots That Pour: New Pouring Jugs and Bowls

New Pourers

Just a quick blog about pots that pour! I do enjoy making pots with pouring lips. There's something about adding a lip to a shape that instantly transforms it into a pot with purpose. It seems to say 'look, you can pour stuff out!' and that makes people identify with them, and imagine all sorts of ways of using them. Also, a pouring lip gives a pot a sense of character - a bit of personality.

Above are my newest pouring jugs. These are a variation on my 'tip jug' - in other words jugs without handles. These are a bit taller and straighter in design and measure about 6.5cm high (that's about 2.5 inches or so). Dispensing with the handle makes using these jugs an even more tactile experience - they feel so nice in the hand and they're easy to grab and use. Sometimes handles can actually get in the way of function; because you have to turn the jug around to get at them. These little jugs are just grab and go! They're available for sale now in my Etsy Shop.

Freshly Thrown Pouring Bowls

And here's my latest 'pots that pour': some new pouring bowls. These are a larger size to go with my drizzle bowls and 'medium' pouring bowls. As you can see they're freshly thrown in the picture - still on their batts. Since then I've turned the bases and they're now drying in the studio. But in the meantime, here's some photos of my smaller sized pouring bowls. I took these recently for listing in my Esty and Folksy shops. Hope you enjoy them!

Pouring Bowls, Drizzle Bowls


Sunday, 9 June 2013

Packing Kilns and Thunderstorms

Kiln, shelves, mask, tongs, gloves and packed pots.

I wonder how advisable it is to pack an electric kiln during a thunderstorm? This was my exact thought on Friday around 7am during a very atmospheric summer thunderstorm that lasted most of the morning.

Lightning flashed and thunder rumbled around in the distance or crackled close overhead. And I was out in my studio under a flimsy wooden roof, packing a bisque kiln. This requires leaning deeply over into it headfirst to place pots on the lower shelves. An electric kiln remember, encircled by elements made of coiled metal wires and encased within a metal jacket. Like a huge circular toaster…

I finished packing the kiln and closed the lid. Wearing a more sensible hat, I decided to leave firing the kiln until much later in the day when all threat of thunderstorms was over. So now perhaps I should add another safety check to my list when packing kilns.


Bisque fired pots ready for glazing.

Here’s my kiln-packing safety checklist:

  1. Make sure the kiln is switched off. Obvious perhaps, and in fact my kiln has a safety feature which cuts off the electricity supply when the kiln lid lock is opened.
  2. Clear all the space around the kiln. So I don’t trip over anything.
  3. Wear a mask. My kiln has a lot of ceramic fibre around the top rim, which is an irritant, and harmful if breathed in. (Yes, thank you manufacturer for warning me!!) It’s horrible stuff so I wear a P3 mask, an old long sleeved shirt and even gloves so it can’t irritate my skin. I also drape an old tea-towel on the kiln edge when I lean over it to minimize brushing any fibres up into the air.
  4. Mind your backs. Here’s the dilemma: trying to carefully lower a heavy shelf down into a deep kiln with only a narrow gap for fingers and without breaking fragile pots beneath or damaging the sticky-out thermocouple at the side. Oh yes and without any possibility of bending the knees! The answer – do yoga.
  5. Remember the pots. Pots that are ready for bisque firing are brittle like chocolate eggs and sometimes the mind starts to obsess about placing that last extra pot into a tight awkward space. It’s easy to take a chip out of pots this way or make a crack. I use my tongs (which I bought a long time ago!) to place small tricky items lower down in the kiln or between gaps.
  6. Don’t load a kiln during a thunderstorm.