Monday 1 December 2014

Homes and Gardens Magazine Feature - Bird Tail Pouring Bowls


© Homes and Gardens Magazine December 2014

Recently I found out my 'bird tail' pouring bowls were featured in this month's Homes and Gardens Magazine (December 2014 issue). It was a complete surprise and I'm so pleased - especially as they look great too which is the most important thing!

I have two sizes of bird tail bowls - a small one that fits in the palm of your hand and a larger one about the size of a normal cereal bowl. Both have been featured in Homes and Gardens Gift Guide along with a selection of other Christmas gift ideas for budding chefs.

© Homes and Gardens Magazine December 2014

In the feature they used my blue and white bird bowls but I also make them using a contrasting brown and oatmeal glaze combination in the smaller size. All my bird bowls are available directly from me via my Etsy and Folksy Shops but in the feature they're also stocked by Aram Store in Covent Garden, London. 

It was such a lovely surprise and a great way to end a very busy year...!


Wednesday 12 November 2014

Christmas Crafts at Quarr Abbey 2014


Next week I will be exhibiting in a group show called Christmas Crafts at Quarr Abbey with four other art and craft makers from the Isle of Wight. This will be our fifth Christmas show at the Abbey - our first was back in 2010 (which you can read about here) - so it's become something of an annual event for us!

This year we're joined by Peter Wright of Wright Turned who makes beautiful handmade wooden pieces on a lathe - some of which you can see in the image at the top of this post. It's always good to have a range of different craft disciplines to give people choice and variety in a show. This year I think we have a lovely mix of materials that complement each other well and have a wide appeal - ceramics, textiles and wood. So we're looking forward to it.

Here's the details of our show if you happen to be passing...!


Christmas Crafts at Quarr Abbey 2014

Thursday 20th November – Tuesday 25th November 2014

Open Daily 10.30am – 4.30pm

Quarr Abbey Gallery, Ryde, Isle of Wight, PO33 4ES

Free Admission


Exhibitors:

Jude Allman is a potter who makes hand thrown stoneware vases, bowls, jugs and homeware accessories decorated using simple glaze combinations in a modern rustic style.

Peter Wright of Wright Turned makes natural lathe turned wooden platters, bowls, cups and garden dibbers using wood from native Ash, Oak and Beech trees.

Lis Toft is a maker of intricately decorated porcelain vessels and jewellery with bronze and turquoise flowing glazes.

Sue Wright Handknits is a hand knitter, weaver and spinner who designs unique clothing and homeware accessories including scarves, socks, bags, rugs and runners in soft practical yarns.

Tim England is inspired by fragmented shadow and light, and combines abstract and figurative aspects in both his paintings and ceramics.


Sunday 7 September 2014

Coffee Set and Coffee Bowls

What a busy summer! Since my last post I've been potting away making lots of pots for wholesale orders and a few private commissions too. And it seems to be a quirk of making pots that sometimes different people ask for similar things. 

This past month the theme was coffee and I was asked to make a coffee set (as seen in the photos above). This included a coffee pot (complete with lid and pouring lip) a lidded sugar bowl and a set of four coffee mugs. Although I've made each of these items separately before this was the first time I've made them together as a matching coffee set. 

The most tricky thing to do was the coffee pot itself of course as it required so many composite elements. The body of the pot is essentially a big jug, but since it was a part of a set, I had to make it big enough to hold a liquid capacity that would pour out and fill at least four of the matching mugs' worth of coffee! Then it had to have a handle strong enough to hold the weight of it plus all that liquid, while at the same time being comfortable to use and pour. And finally it had to have a lid which not only fitted but allowed pouring through the lip or spout whilst in place. As you can see in the photo I also cleaned back the glaze from the rim of the coffee pot to leave a section of un-glazed bare clay. This makes sure the lid doesn't stick to the pot permanently when fired in the kiln.

In the end I was very pleased with the result because everything matched and all the elements worked: and most importantly my customer was happy too! The glaze I used for the coffee set was a new version of my wood ash glaze. This has proved such a popular glaze and works especially well with rustic style coffee themed items! Below is another wholesale order I finished recently: a batch of coffee bowls using another version of my wood ash glaze. I actually have two of these coffee bowls left spare - and both are available in my Folksy Shop now. I hope you enjoy the photos!


Thursday 24 July 2014

Open Studios 2014

Some of my pots on display

I had a great time at my Open Studio show last weekend. This year I was exhibiting jointly with two other artist/craft makers from the Isle of Wight: Anna Hayward and her daughter Ellen Hayward. They were very kind enough to let me share their studio space - three separate wooden workshops in a lovely garden setting. We were open for four days - Friday to Monday - and had a steady stream of visitors throughout. It was a really successful show with lots of sales and positive responses to our work - and it's so nice to have people come out especially to see you too!


The middle workshop - where I was!


Anna Hayward makes beautiful handmade glass beads and jewellery from her little studio: hence the name of her business Little House Jewellery. Throughout the weekend Anna demonstrated glass bead making using coloured glass rods which are melted in a flame and then slowly cooled in a kiln. Visitors could also assemble their own jewellery pieces using a selection of handmade beads.


Anna's studio

Ellen Hayward is a professional Textile Designer currently specialising in interiors. Throughout the weekend she demonstrated her expert hand weaving skills on her gorgeous AVL loom - as you can see below. Facebook

Ellen's Loom

Ellen's weaving

So a big thank you to everyone who popped in to see us. And an even bigger THANK YOU to Anna and Ellen for letting me share their workspace (and for all the lovely teas and cake!)


The second week of the Isle of Wight Open Studios starts tomorrow for Eastern Wight.


Thursday 26 June 2014

Biscuit Bowls - Yummy Cookie Bowls

One day I was carrying a mug of tea in one hand and some biscuits in the other and I had a brainwave. A little biscuit bowl; just big enough for a couple of biscuits. A small shallow bowl to catch all those precious chocolatey crumbs and cute enough to feel like a special treat (without eating the entire packet).

One of my favourite things about pottery is that now when I have an idea for a pot I'd like to own myself, I don't have to wait for someone else to think the same way or look out for something similar-but-not-quite-right in the shops. Instead I can actually make it. And so these are my first little biscuit bowls (or cookie bowls if you like).

I wanted these bowls to be a bit special so I decided to write a biscuit based message on each using letterpress letters impressed into the clay when wet. These are highlighted in a deep brown oxide wash under a lovely neutral glaze. I think this gives them a really cosy but cute feeling - and can be personalised if people want.

I also decided to use a different clay for these bowls. This clay has a lovely light neutral or ecru shade with lots of dark speckles - which I thought would be perfect to go with biscuits. I also left the underside of the bowls completely unglazed to reveal and emphasise the natural bare clay.

My new biscuit bowls are now available to buy in my Etsy shop. Enjoy!


Thursday 1 May 2014

Getting Inspired: Beach Finds

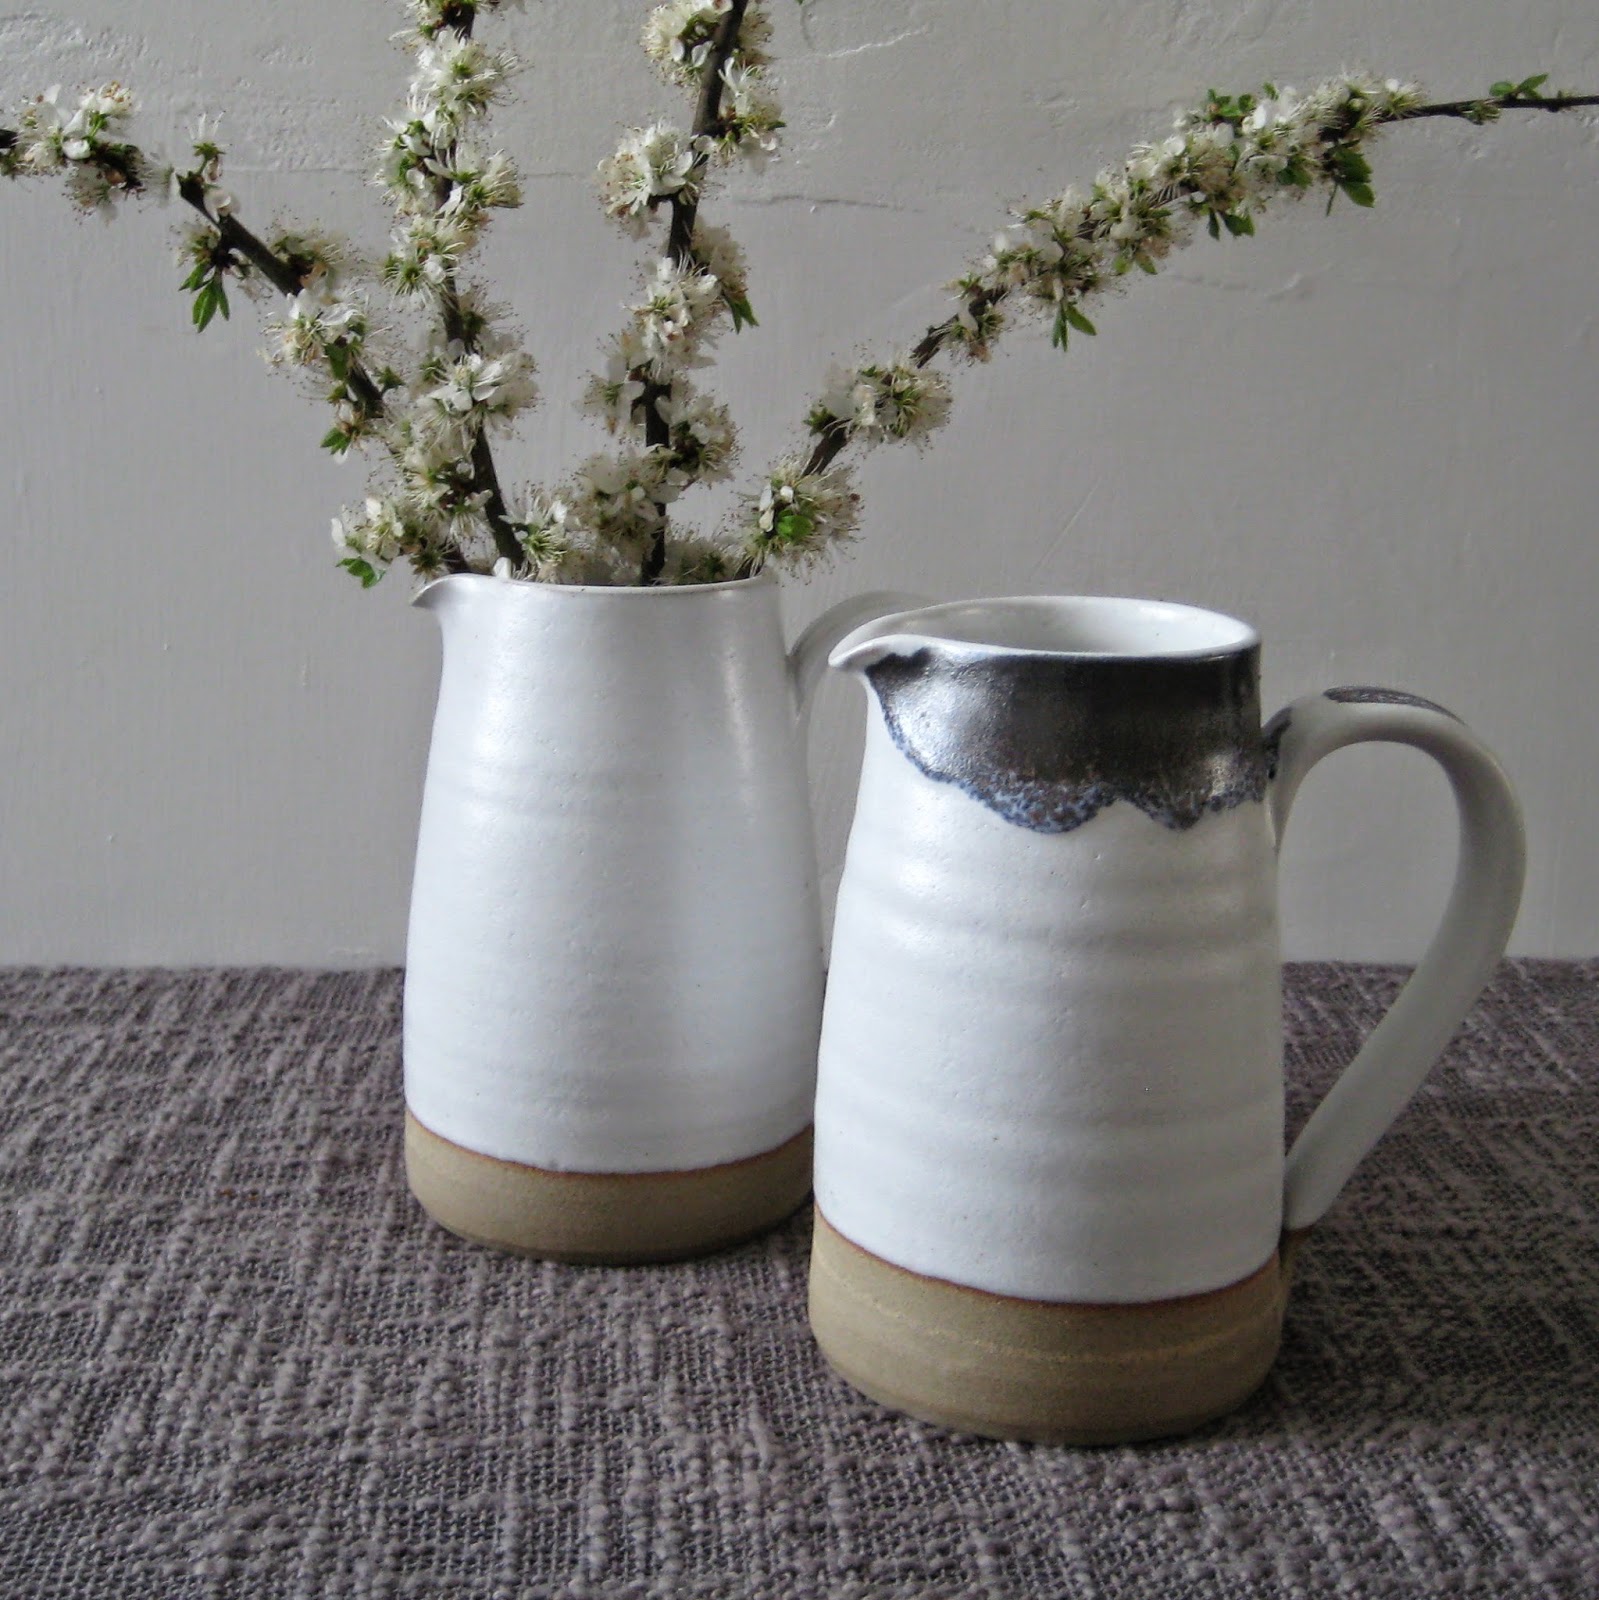
Pretty Pink Vases - with Glazing Tests
Sometimes I forget how spoilt I am living by the sea. My nearest beach is only a mile away and takes 15 or 20 minutes to walk there. Strangely this 'in between' distance (close but not really close...) feels far enough away to be more than 'just popping down to the beach' and requires at least an hour out of the day and a nice hot thermos of tea to properly appreciate. For this reason I probably don't pop down as often as I'd like to. But when I do go I usually find something to inspire me.

Getting inspiration from the seaside is nothing new of course. Artists are always doing it. And there can be a danger in just repeating what everyone else is doing. So when I look for things to inspire me, I try to look for the 'not-so-obvious'. 

My local beach is mostly shingle, and leans towards the 'small seaside-town/polite walk along the esplanade' side of things rather than remote and windy wilds. Nevertheless, even in a tiny narrow strip of civilised beach there's plenty of little pebbles, shells, driftwood and other shore finds to poke a warm boot at.

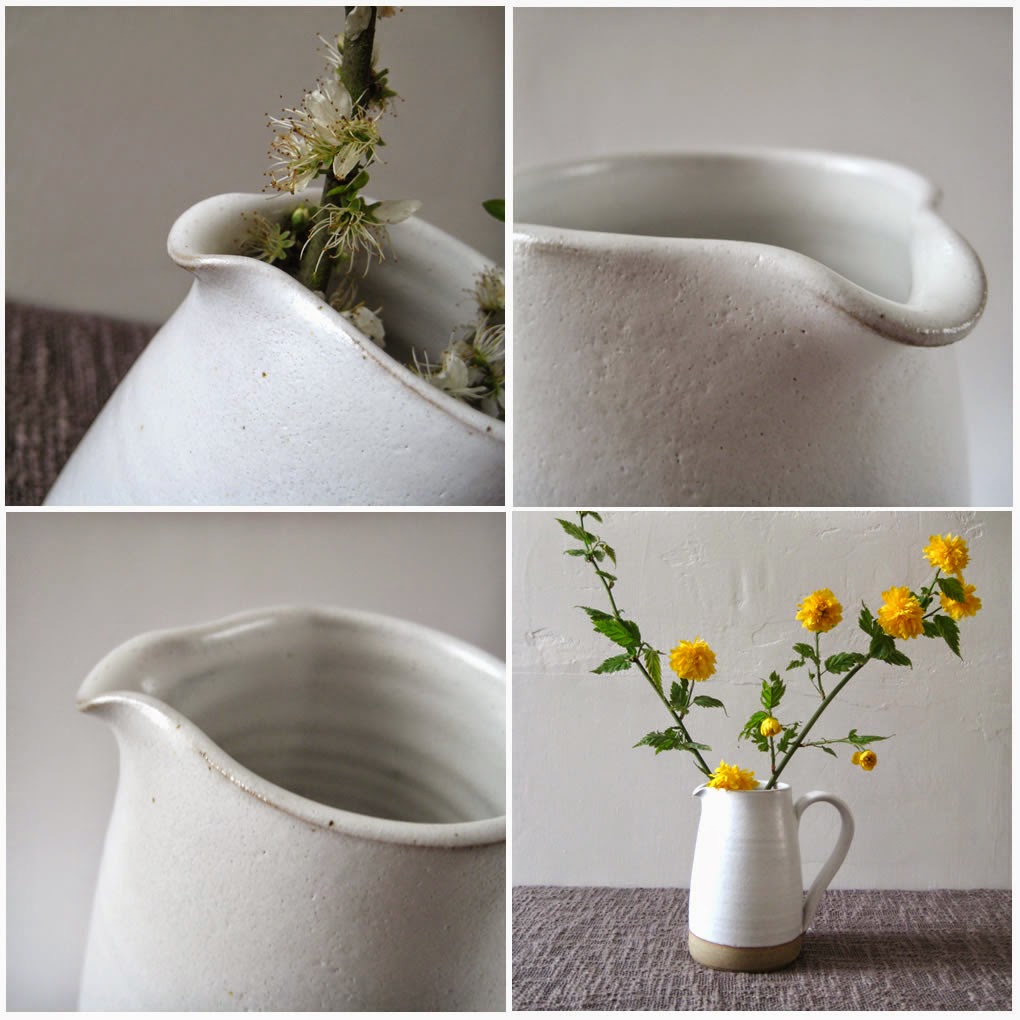
Pink Vase Detail - Seaweed and Shells
My latest vases are inspired by a choice of three colours found on my local beach. Pink isn't an obvious colour when you think of the seaside, but there's actually quite a lot of it on my beach. There's plenty of subtle shades of pink in the local shells: these look like a type of sea snail and range from the usual coral shades to unexpected deep maroons. Even some of the grey pebbles have a warm pink tone to them. But most of all there's lots of vibrant pinks and purples in the local seaweed which - once you start looking - pops up everywhere in little clusters. These can look like little pink flowers on the sand or miniature trees draped over the stones.

White is perhaps a more obvious colour to choose. White for the surf, white for the smooth insides of shells and white for chalk pebbles and clouds.

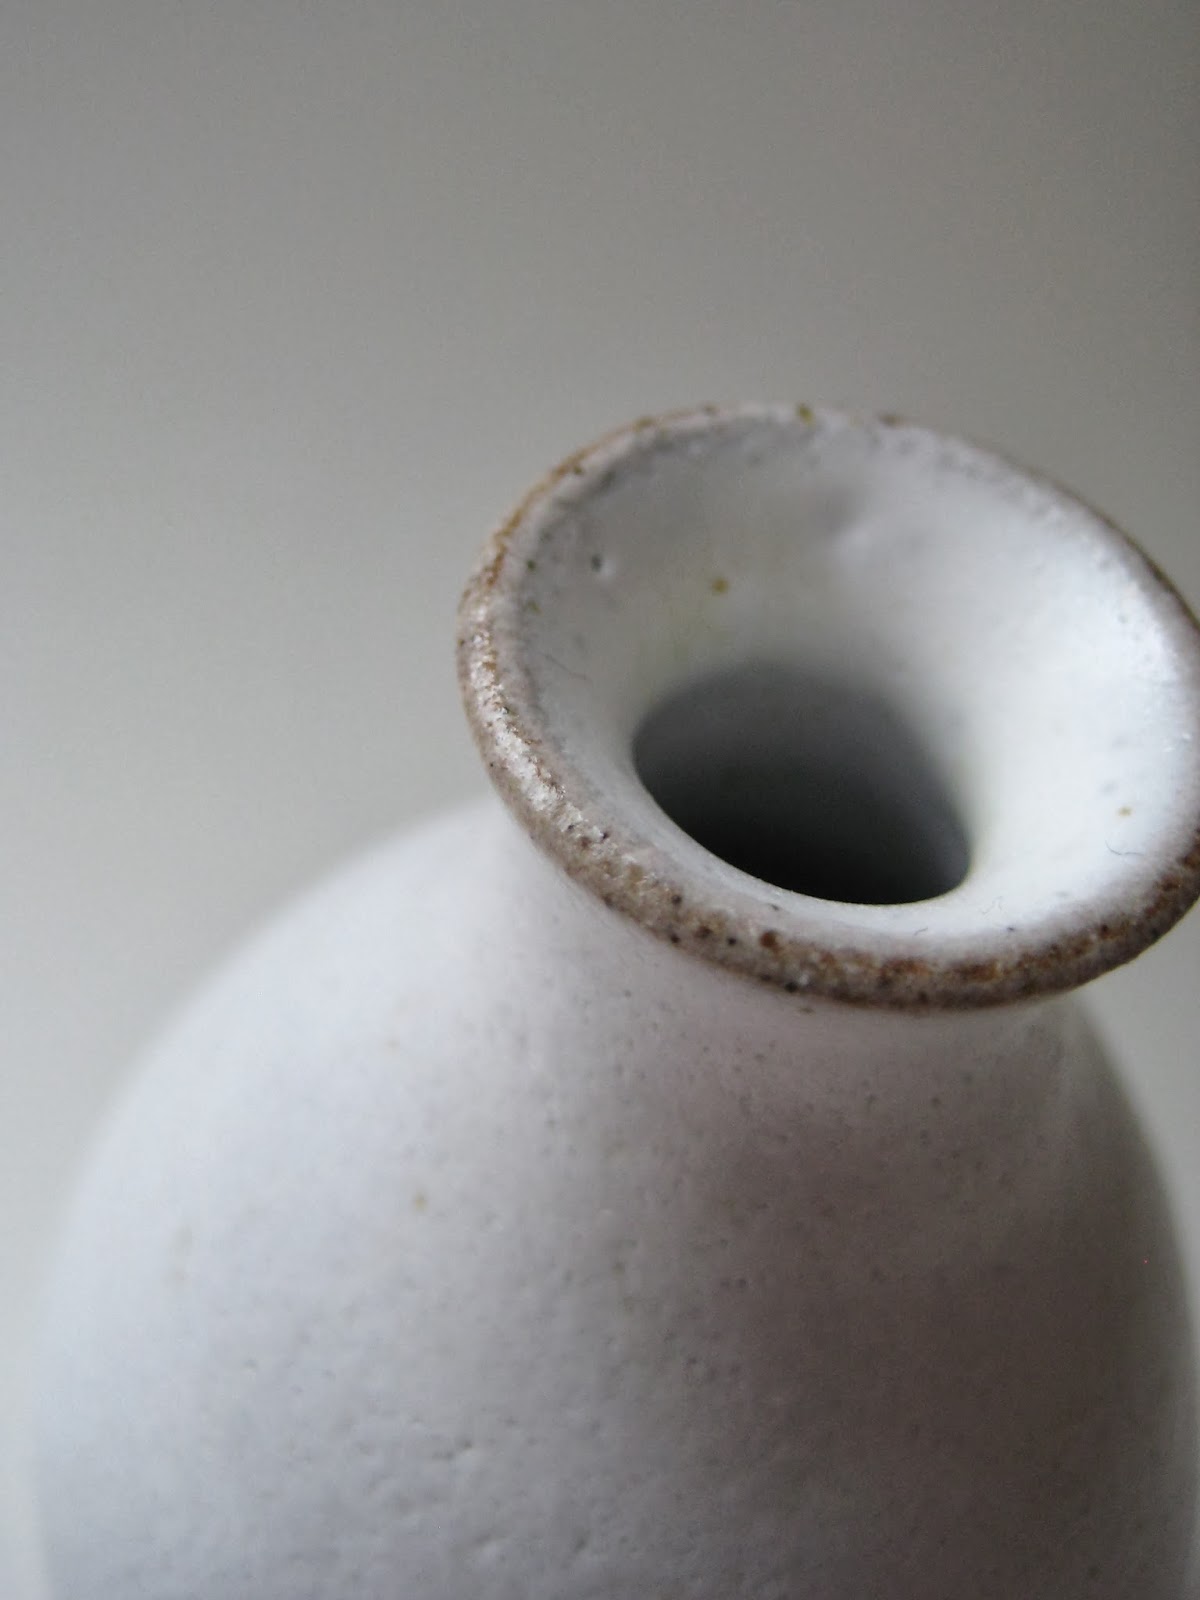
The last colour I chose was the beautiful pale frosted green found in sea-glass. I quite like the idea that pieces of sea-glass are ordinary manmade objects made beautiful by the sea: that being rolled around in the shingle and the waves for years gives them a quality that sets them apart. Part natural, part manmade. And of course being fragments of glass means they fit nicely with the idea of glazing on pots.

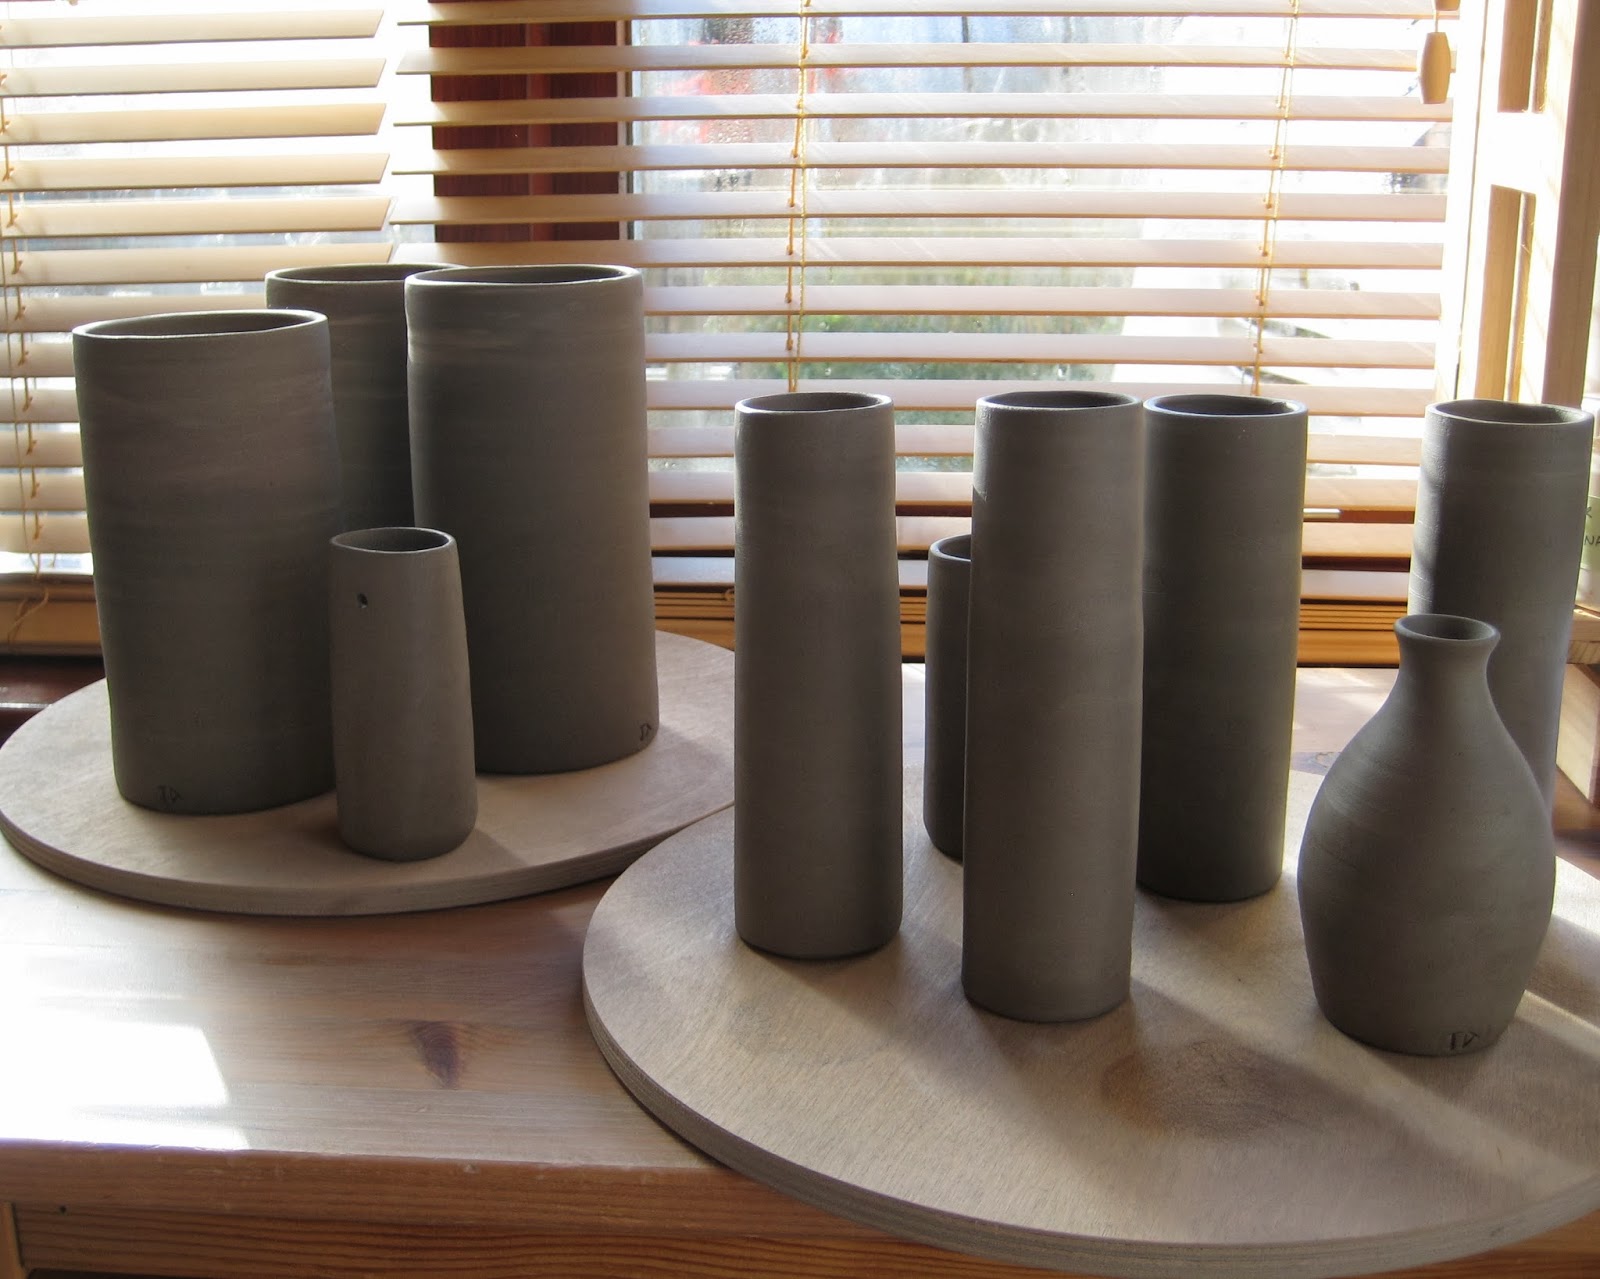
Sea-glass and Overlapping Edges
Once I had my three colours - pink, white and pale green - all I had to do was combine them in a design that complemented each other. I chose glaze recipes that were similar in tone (pale) and in texture (glossy and semi-opaque). This allowed them to work with each other as a range, as well as with my existing white glaze - a satin matte. 

I knew even when I was standing on the beach that I would be overlapping the pink and green glazes with the white: just at the edge where they meet. This always gives a small band of extra interest in glazing and fits perfectly with the idea of the shoreline. And then in terms of the form of the vases themselves, well that was easy: it came from the opposite shoreline...

The Other Shore

My new vases, both the Pale Pink and Sea-glass Green, are available for sale in my Folksy and Etsy shops.


Thursday 17 April 2014

Spring Flowers and Jugs


Spring is definitely here; I've been sneezing all day and the local blackbird hasn't stopped singing all week. It's been lovely to hear him while I'm in the studio - he's picked a tree at the end of the garden to call from (he's very loud...), and so far he's been pretty inventive with his tunes too, trying out all sorts of variations. Sometimes though while I'm throwing pots or trying to concentrate on something fiddly, he can be a bit distracting; chirping in at exactly the wrong moment and putting me off...!

Last week the latest jugs were finally finished and came out of the kiln. These are the same jugs which featured in my last blog post. Of course I've been photographing them again (!) this time for a series of shots I can use for listing them in my shops.

I also put together these two composite/multiple photos (above and below). Composites are quite a nice way of showing off pots because they allow different angles or details of a pot to sit side by side at a glance in one image. It also avoids the 'long scroll down' through loads of photos of the same pot!

I used to make composites just for my blog and for my flickr account, but recently I realised they'd be useful in my listings too. I don't know why it took me so long to think of it! Maybe I thought it wasn't possible to load them - although I save them as jpegs like other photos, and so far Folksy and Etsy have accepted them fine. Maybe I thought it was cheating! Effectively you get three extra images in one photo; which can be useful when you have so many angles to show off. Sometimes I have so many photos left after a shoot that it's a shame not to show as many as possible.


I'm very pleased with how these jugs came out. The oxide band around the rim and down the handle seen on the jug above has created a really interesting effect. Where it overlaps with the white glaze it has 'bled' and mottled into blues, blacks and browns. It does run a bit though which I'll have to be careful of in future - especially if I use it near a base. Probably don't need to apply quite so much oxide next time. But the result is very successful and makes for a lovely striking feature on this particular jug I think!

Anyway, these jugs are now available for sale in my Folksy and Etsy shops btw!


Sunday 16 March 2014

Three Tall Jugs - Throwing, Making Handles and Taking Photos

Last week I made three tall jugs and decided I'd try to remember to take photos along each of the stages of making - from throwing to attaching handles. This is actually harder than it sounds! Sometimes when you get into the 'creative zone' you forget all about taking photos. And pottery is a messy business: there's water and wet clay everywhere and consequently a huge potential for accidentally dropping a digital camera into a bucket of sludge... (Thankfully, I didn't do that by the way!)

Tall Jug - On the Wheel on a Wooden Batt
Tall Jug - On the Wheel, Lip Formed
The other reason why it's sometimes difficult to remember to take photos is that pottery doesn't happen in just one day. The initial stages of making a pot - especially a hand-thrown one - can take several days: by which time the plan to take photos can slip the mind. Above you can see two photos I remembered to take (!) after finishing throwing the first of these jugs. They show the jug still on the wheel, freshly thrown and still on its wooden batt. As you can see, I've finished forming the jug and even put in the lip. I've also cleaned off the batt with a sponge - because when throwing it gets covered in slip clay.

First Jug - Off the Wheel (and Mugs Drying!)

Three Tall Jugs on Batts
The next stage is to take the jugs off the wheel and put them aside to start drying out. This is what the wooden batts are for: they allow a larger thrown pot to come off the wheel supported on their own surface so they don't lose their shape when being moved. Then I simply put the next batt on the wheel and throw the next jug. The above photos show the freshly thrown jugs drying out still on their batts (also some mugs drying upside-down in the background!) No photos of the actual throwing process itself though...

Attaching Handles
Cut to the following day and the jugs were still very wet. It was late afternoon before they could be persuaded to come off the batts at all (using a wire). Then I could begin to 'turn' the bases. This involved putting them back on the wheel upside down and trimming the bottoms to tidy them up. And just to prove my earlier point about forgetting to take photos I forgot to take any of this particular stage! In fact overall it was a frustrating day. The weather was dampish so everything was taking ages to dry and I had to use a hair drier on the pots (which I don't like to do) to try to hurry things along. It was late in the evening before either the jugs or their intended handles (which I made for them that day) were ready for me to attach and put together. Hence the only photo I remembered to take was this one above - a bit late in the evening when it was dark and I had the very last handle to add!

Three Tall Jugs - Drying

Three Tall Jugs - And Oxide Decoration
And then it's two days later before I remember to take any more photos! In the meantime the jugs were positioned upside-down on their rims to allow the handles time to dry onto the body of the pots. In this position gravity helps keep the handles 'stuck on' and discourages them from cracking away at the join. Of course then the weather changed that day and became sunny and warmer - so I worried the jugs might dry out too quickly! To avoid this I draped plastic over them to keep them damp.

Above are two photos showing the three jugs safely attached to their handles. At this stage I was confident enough to put them right-way-up again and take off the plastic to let them air dry. The pot on the left though you may notice has some decoration added to it. I've brushed on an oxide mix around the top rim and down the handle. Proof yet again that I forgot to take photos and completely missed out another stage of making! Oh well, another time.


Friday 28 February 2014

Pancake Day Special: Set of Two Pouring Bowls

For quite a few years now I've been forgetting to remember Pancake Day. Perhaps it's because the date moves around every year; I never know when it's going to pop up. Also these days IAC is gluten free - so torturing him with the smell of freshly frying pancakes seems ever so slightly cruel...and just think, I'd have to eat them all by myself! So for a couple of years now I only notice it's whizzed past un-celebrated when I stroll into the supermarket and see a haphazard 'after-the-rush' display of flour, eggs and squeezy lemons on special offer.

But this year I decided I wanted to feature my pouring bowls as a set - so Pancake Day seemed the perfect opportunity. I've been making my pouring bowls for about three years now starting off with my smallest size 'drizzle' bowl and then adding a medium sized batter bowl. I also make a larger version which is currently made-to-order only. I had wanted to offer a three-bowl set in time for Pancake Day, but I'm out of stock on the larger bowls. So instead I'm offering a two-bowl option at the moment featuring one medium and one small pouring bowl as a Set of Two.

I hope you'll agree they're very cute bowls! I have a set myself in the kitchen which I'm always using for just about everything. The extra functionality of the pouring lip just means these bowls are often my first choice out of the cupboard - because then if I happen to need to pour anything when cooking, I'm ready and prepared.


The photo above shows the Set of Two pouring bowls on offer which includes one small 'drizzle' bowl and one medium batter bowl. These are currently available in both my Folksy and Etsy shops priced at £28. (This gives a discount of over 10% on buying them individually.)

By the way, just in case you don't know, this year Pancake Day is Tuesday 4th of March!

Thursday 6 February 2014

Tealights, Hearts and Valentine's


Making pots can be a fiddly process, especially when you start cutting holes into clay. You have to make sure the pots are wet enough not to bend or buckle under the pressure of cutting, but also not too dry or you risk cracking the clay. So when I decided to make these new tealight holders with a cut-out heart motif, I knew I'd be spending a long afternoon muttering to myself!


The hearts were made using a normal heart shaped cookie cutter - and the holes with normal hole cutters. Hole cutters are designed to make holes in clay of course, so they're fairly straightforward to use. But cookie cutters are generally expected to be used on a flat surface, cutting into dough or pastry. To use them on an elevated, curved wall - like a pot - requires a bit of care. But as long as you take time and put even pressure on the cutter whilst supporting the clay at the back, they cut quite cleanly. 


In a perfect world, the heart-shaped leftover cuts-outs could be used for making my double heart decorations (below). I've been making these little hearts for quite a few years now. They're popular as little gifts for people all year round; as gift tags, decorations, keepsakes and love tokens. But unfortunately the leftovers from the tealight holders were just too distorted (after all they'd been through) to re-use; so instead they had to go in the recycling!


But I'm pleased with my new tealight design. You may remember I made an earlier version a few years ago which was essentially the same, except instead it featured a series of different sized round holes. I think this new version with the heart motif gives them a different character: and it's always nice to give customers options. From my point of view it's also good to keep developing an existing design by returning to it and re-freshing it. Then you don't feel like you're making the same thing forever!


Luckily all my new heart motif tealight holders came out of the kiln safe and sound - just in time for me to put them in my Folksy and Etsy shops for Valentine's! Hope you enjoy them.


Friday 24 January 2014

New Beginnings and New Bud Vases


Yesterday I fired the first kiln load of the year! I've been busy since the beginning of January trying to make enough pots to fill a bisque kiln. It hasn't been easy, especially since the studio roof has been leaking (again!) in all this wet and windy weather. During one particularly heavy downpour, I even decided to wear my waterproofs indoors to avoid the drips... The general atmosphere has also been so damp, the pots have taken ages to dry. But, moaning about the weather aside and despite everything, I managed to get the kiln going yesterday for my first bisque - and so today (while I'm waiting for the kiln to cool down) I thought I'd blog about some new pots I've been making.


Before Christmas I started to throw a few new vase shapes. I wanted to make some small bud vases with a belly form and also some straight slim and narrow 'stem' vases. Above is a photo of the first small test batch I made before Christmas (shown in leatherhard stage and drying out). They're all hand-thrown as usual, but the straight narrow vases have been thrown in two parts: two thrown 'tubes' which are then spliced together when they're both leatherhard. This sort of making is called composite making, and it's something I've started to experiment with. It's especially useful for making taller pots and for making narrow forms (for when your fingers can't fit inside the pot during throwing).


I've started to list a couple of these finished pots in my Etsy and Folksy Shops - and hope to add the rest in the coming weeks. All being well, there should also be more narrow vases in the same style from this first bisque kiln - once I've glazed them and fired them again of course. But I'm very pleased with this first selection and I'm looking forward to developing the theme further this year. Hopefully it's going to be a great new year with lots of new pots!