Showing posts with label Wheel. Show all posts

Friday, 1 January 2016

New Year, New Beginnings


It's New Year's Day today and I'm starting as I mean to go on! It's been a really busy Christmas season and my stock of pots is very low. But before I can re-stock I have some orders to complete - in fact the first kiln of the year is already booked up! So I've been throwing some beakers today as part of an order of 20.

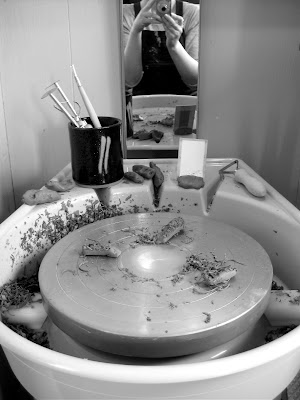
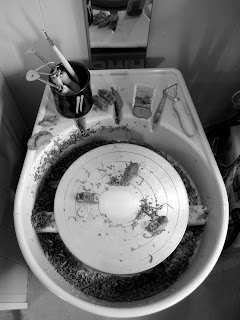
Today has been the first chance I've had to get on the wheel in quite a while - and it's good to get back to making. The photo above shows how dark it is in the studio at the moment, even in the middle of the day.

Anyway, it's just a quick post today really, to say I'm still here! I left the blog alone for quite a few weeks I notice during all the Christmas rush - there was just no time to keep posting. Things have calmed down a little in the last few days though and so I'm looking forward now to getting back into making some new pots for the New Year.

Happy 2016!


Sunday, 16 March 2014

Three Tall Jugs - Throwing, Making Handles and Taking Photos

Last week I made three tall jugs and decided I'd try to remember to take photos along each of the stages of making - from throwing to attaching handles. This is actually harder than it sounds! Sometimes when you get into the 'creative zone' you forget all about taking photos. And pottery is a messy business: there's water and wet clay everywhere and consequently a huge potential for accidentally dropping a digital camera into a bucket of sludge... (Thankfully, I didn't do that by the way!)

Tall Jug - On the Wheel on a Wooden Batt
Tall Jug - On the Wheel, Lip Formed
The other reason why it's sometimes difficult to remember to take photos is that pottery doesn't happen in just one day. The initial stages of making a pot - especially a hand-thrown one - can take several days: by which time the plan to take photos can slip the mind. Above you can see two photos I remembered to take (!) after finishing throwing the first of these jugs. They show the jug still on the wheel, freshly thrown and still on its wooden batt. As you can see, I've finished forming the jug and even put in the lip. I've also cleaned off the batt with a sponge - because when throwing it gets covered in slip clay.

First Jug - Off the Wheel (and Mugs Drying!)

Three Tall Jugs on Batts
The next stage is to take the jugs off the wheel and put them aside to start drying out. This is what the wooden batts are for: they allow a larger thrown pot to come off the wheel supported on their own surface so they don't lose their shape when being moved. Then I simply put the next batt on the wheel and throw the next jug. The above photos show the freshly thrown jugs drying out still on their batts (also some mugs drying upside-down in the background!) No photos of the actual throwing process itself though...

Attaching Handles
Cut to the following day and the jugs were still very wet. It was late afternoon before they could be persuaded to come off the batts at all (using a wire). Then I could begin to 'turn' the bases. This involved putting them back on the wheel upside down and trimming the bottoms to tidy them up. And just to prove my earlier point about forgetting to take photos I forgot to take any of this particular stage! In fact overall it was a frustrating day. The weather was dampish so everything was taking ages to dry and I had to use a hair drier on the pots (which I don't like to do) to try to hurry things along. It was late in the evening before either the jugs or their intended handles (which I made for them that day) were ready for me to attach and put together. Hence the only photo I remembered to take was this one above - a bit late in the evening when it was dark and I had the very last handle to add!

Three Tall Jugs - Drying

Three Tall Jugs - And Oxide Decoration
And then it's two days later before I remember to take any more photos! In the meantime the jugs were positioned upside-down on their rims to allow the handles time to dry onto the body of the pots. In this position gravity helps keep the handles 'stuck on' and discourages them from cracking away at the join. Of course then the weather changed that day and became sunny and warmer - so I worried the jugs might dry out too quickly! To avoid this I draped plastic over them to keep them damp.

Above are two photos showing the three jugs safely attached to their handles. At this stage I was confident enough to put them right-way-up again and take off the plastic to let them air dry. The pot on the left though you may notice has some decoration added to it. I've brushed on an oxide mix around the top rim and down the handle. Proof yet again that I forgot to take photos and completely missed out another stage of making! Oh well, another time.


Saturday, 15 September 2012

Making Pouring Bowls

Turning or trimming base
In the past couple of days I’ve been making a small batch of batter bowls or larger pouring bowls. These are bowls with a pouring lip that prove really useful around the kitchen when cooking. I use one of my own pouring bowls regularly for beating eggs to make quick omelettes. They’re about the size of a normal breakfast bowl so they’re very handy to have around compared to traditional mixing bowls which are often huge cumbersome things stored at the back of cupboards. And of course having the lip just means they’re satisfying to use – which is the main thing of course.

Lifting Bowl off wheelhead after turning

These larger pouring bowls are really ‘a size up’ from my small drizzle bowls. So basically they follow the same shape and design but on a larger scale. Back in April I made a variation on my drizzle bowls by adding a small thumb handle. I called this variation ‘bird bowl’ pouring bowls because the handle seemed to look like a bird tail. They’ve proved quite popular and I’ve been asked to make a larger version of them. So in the same batch I’ve also made a couple of test bowls to see how feasible they are on a larger scale.

Making thumb handles

So far this larger bird bowl design seems to work. Sometimes scaling-up changes the nature of a pot so much that different sizes don’t always seem to relate to each other. Happily at the moment they have the same sort of vibe as the little ones do. I had to reconsider the design of the thumb handle so it could withstand the extra weight. An odd feature of making pottery is that logic, maths and ratios don’t always make sense: just doubling the size of the handle for instance wasn’t going to function well or look right. Instead I extended the width of the tail to accommodate the whole thumb and give support. Hopefully this will retain the function as well as keep the ‘feel’ of the little bowls. Of course I won’t know if they work as a design until they’ve been glazed.

Larger 'Bird Bowl Pouring Bowl'
Anyway, I’m quite pleased and excited by this larger size. When making pots I always think it’s a good sign if you feel the urge to keep one for yourself.

Detail handle and lip


Thursday, 16 August 2012

Winter Landscape - Side Plates

Winter Landscape Side Plate
Back in July I was invited to take part in a promotional plate display idea as a part of UK Clay Users on Etsy. I don’t normally make plates. Large flat pieces tend to have a high mortality rate at various stages of making – they’re prone to cracking while drying or warping in the kiln, which makes them a costly item to make. However, since this was a ‘one-off’ idea, I thought I’d have a go at throwing a couple of small side plates and see how things go!

Winter Landscape Side Plate - Detail
Well yesterday I finally sent off my submission, which you can see in the photos above. This plate measures about 15cm across (or 6 inches). It’s made from stoneware clay and glazed using two different glazes: a white gloss and a blue/black glaze, which I’ve overlapped to create the idea of a landscape. The theme for the promotional idea was 'Winter' so I’ve called this one ‘Winter Landscape’. The other plate I made at the same time has been decorated using the same two glazes but with a slightly different approach. I’m planning to put this second plate into my Etsy shop available for sale in the near future.

Throwing Plates on a Bat


Freshly Thrown Plates on Bats
In the meantime though here are a couple of photos of both plates being thrown. As you can see they’re quite small – this helped to reduce the risk of cracking and warping. But it also means they’re very cute and perfect for just a couple of grapes or a snack as you can see in the last photo below!

Winter Landscape Side Plate with Grapes


Friday, 29 June 2012

Turning Pots Using Mirrors

New mirror opposite wheel for turning pots
Over the past couple of weeks I’ve been trying out a new system in my studio to help me while throwing and turning pots on the wheel. I’ve had an old mirror lying around the house for years. It was taken off an unwanted wardrobe that the previous owners of our house had left behind: so you can imagine it was one of those long, tall, thin mirrors for seeing yourself full length. I had a feeling it would come in handy ‘one day’ so kept it, but hadn’t found a use for it - until now.

Recently I’ve been suffering from unexplained pain, headaches and numbness in my head and neck. A bit worrying as you can imagine, but after a couple of visits to the doctor and some serious re-assessment of my work practice, I came to the conclusion this was probably self-inflicted. I have a throwing habit that means I tend to strain my neck sideways by snapping quickly over to the right when I check the profile side of a pot. My doctor kept insisting I balance this action by checking the pot on the other side – but since there’s a wall on the left-hand side of my wheel (putting me in danger of cracking my head open) I’ve decided to ignore this suggestion entirely and instead opt for using a mirror to stop me from ‘side-checking’ altogether.


Turning pots using two mirrors
For years I used to use a small hand-mirror for throwing and turning but since I got my shimpo wheel last year I’ve dropped the habit for some reason. I know that potters are divided on the idea of using a mirror to help throw or turn. Some think using one doesn’t give a true representation of the shape of a pot and prefer the directness of seeing or touching the pot for real. I’ve always had the opinion that throwing a pot is hard enough as it is! So anything that can help or ‘ease the pain’ in the process of making a pot, is a potential tool like any other and therefore a positive thing. And after recent events I really can’t afford not to use one.

So I got the old glasscutters out and sliced my old mirror in two (it being far too tall just to lean against the wall). Luckily there was already a hole in the mirror where it used to attach to the wardrobe, and all I’ve done is screw this into the wall directly opposite my wheel. I also use my old hand mirror at a closer angle so I can get a ‘multi-mirror’ view of my pots: a bit like driving a car! Already I’ve noticed my symptoms are improving. I’m hoping that this new, safer work practice will have nipped the problem in the bud. And so far the pots are coming off the wheel quite nicely too!

Friday, 6 January 2012

All About The Making


I’ve decided that 2012 will be all about the making. It’s so easy to get sidetracked and caught-up in the other aspects of this pottery/painting lark. Admin, marketing, planning shows, queueing at the post office, buying tissue paper and scrounging cardboard boxes from local supermarkets. Sometimes it can seem like all I do is the business side of things. Of course this stuff is a crucial part of what I do and can’t be ignored. But in the meantime my poor wheel sits patiently waiting for things to calm down and for me to start making again. I won’t even mention my poor old easel…

And this explains why I haven’t blogged for four entire weeks. It’s the longest gap in posts since I began Pots and Paint back in 2009. But I decided it was good for me to ‘go dark’ for a while, gather some thoughts, and (after the rush of Christmas) concentrate on making. So here are a few photos of some recent throwing.

Above is a photo of my wheel, prepared with a wooden throwing bat, and below is a shot of me in the process of throwing. It’s a slightly staged picture because I had to wash my hands to set the camera on timer!


Above is a photo of a freshly thrown pot. As you can see, the wooden bats come right off the wheel complete with pot on top; this minimises distortion of the shape. Below is a photo of the pots a day or so later, drying. They were taken off the bats using a wire and then the bases briefly smoothed with the thumb – no turning involved. These pots are part of an order of wine carafes featuring a pouring lip at the rim. They will be fired twice and glazed all over in an ash glaze – all being well of course! When making an order it’s always best to make a few extra pots than needed in case of accidents along the way.


Anyway, I quite like the way these pots look in a small group: they remind me of penguins. And so far 2012 is shaping up nicely since I’ve been on my wheel enough times already for my back to start noticing!


Thursday, 19 May 2011

Making Pots and Buying Kit...


Usually when I write a blog post I pick a theme to talk about or focus on one element of what I’ve been up to recently. But this past week has been such a ‘mish-mash’ of different things I wasn’t sure what to pick! So for today’s post I thought I’d put together some pictures I’ve taken in the past ten days and show you a ‘medley’ of the sorts of things I’ve been doing.

Above is a picture of me attaching a handle to a mug as part of an order. The white cord you can see is my ipod which I listen to while working! Below is a picture of some buttons I made for a different order. Here they’re shown drying out ready for firing. These are all stoneware and will measure about 1cm across when finished and will be decorated with a plain white glaze.


Below is a picture of some lovely new brushes I bought from a local art shop. I wanted some ‘hake’ brushes but they didn’t have any in stock so I got these ‘general-purpose bristle-brushes’ instead as a set of three. Since then I’ve already used them for glazing a batch of buttons and brooches and I’m really pleased with them. I’m keeping these for pottery only – I’d quickly ruin them if I used them for painting!


I found this little rush stool (below) from a local second-hand furniture warehouse for a couple of quid. It’s pretty bashed-up (and very 60s/70s!) but it’s the perfect height for throwing with my new shimpo wheel. I started off throwing with a chair that was too high and then changed to a fold-up chair that was too low. So this is my Goldilocks stool…


I’ve started making some smaller mugs which you can see in the picture below. These are freshly thrown and measure about two-thirds the size of a ‘normal’ mug – although I won’t know for certain the exact size until they’re finished. I have a couple of small mugs myself made by other potters: because sometimes it’s nice to have just a small amount of tea or coffee!


Below is a photo of these same ‘mini-mugs’ drying out. Since the last image they’ve been turned and I’ve added handles to them. These will spend the next few days drying out before firing. You may have noticed these mugs are sitting on my new wooden throwing bats! I ordered these last week and they arrived in a big parcel on Wednesday...


Below is a detail picture of my new wooden throwing bats. For those who don't know, these are circular pieces of wood that fit on the wheelhead. They’re for throwing large or wide pots that would otherwise be difficult to remove from the wheel without damaging or knocking out of shape. These bats are 12 inches across and made from birch wood. They're so lovely and new they smell absolutely gorgeous: it’s going to be a shame to get them dirty! They were pretty expensive too – so I’m going to make sure I take care of them and hope they don’t warp. (Sadly I’m not very good at woodwork otherwise I’d have made them myself to save money!)


Anyway, that’s it for today. Hope you enjoyed these pictures!

Sunday, 10 April 2011

Special Delivery


I’m a bit over-excited at the moment. A huge lorry arrived outside the house on Friday morning and left behind this big parcel. I unwrapped it and look what was inside…


A lovely new Shimpo wheel! I’m so pleased with it. It’s a Shimpo Whisper RK3D and I’m so chuffed. Within minutes it was out of the box and set up in the corner of my studio. Then I decided to give my workspace a good clean and re-arrange everything to accommodate my new toy. So here’s a picture of my nice clean workroom…


Yesterday I tried out my new wheel for the first time. I decided to throw a few small bowls just to get used to things. And for the first time in absolutely years I had trouble centering. Two bowls had to go in the reclaim. Now at first I put this down to a) getting used to a new wheel, and b) being over-excited. But two bowls…? I'm used to using different wheels at the drop of a hat without losing a pot. So something wasn’t right. I found a forum on the Internet that suggested if you know it isn’t you who’s the problem then check the wheel head is level. I checked. I got my spirit level out and realized my studio floor is so bumpy the wheel head was sloping all over the place!


So I spent a good half an hour re-adjusting the re-adjustable foot on the wheel and putting pieces of cardboard under the others to get it right. The forum also had a little trick to test if the wheel is running true. Put a pencil with an absolutely flat base up-ended in the very centre of your wheel and spin, increasing the speed. If the wheel is level it will stay upright even at full speed. I tried this with a flat-based brush. At first it flew off the wheel even at slow speed. After lots of fiddling with cardboard it now stays upright. So hopefully I’ve fixed the problem!


Anyway, not all the bowls went in the reclaim; I managed to make three little bowls on my first throw despite the centering issue - and here’s one of them. I’ve added a lip as you can see, and I’ll be turning them soon when they’re dry enough. So I should find out in a day or two how I get on with turning on my new wheel! Still over-excited by the way…