Showing posts with label Making. Show all posts

Sunday, 18 November 2018

Pit Firing 2018


Back in September I tried out an alternative firing technique called pit firing. Although I enjoy using my electric kiln, it's fun to try something different now and again. I used to fire using a raku method but my last firing was seven years ago. Since then I moved house and now have a garden with enough space to try some firing experiments. Time to play with fire!

Pit firing (also known as smoke/sawdust/barrel firing) is a low temperature firing technique with origins in ancient methods of firing pots. Traditionally people stacked pots into a pile or pit in the ground, covered them in wood and other combustibles before setting alight. Instead of using glazes, chemicals found in the combustible materials react in the firing to create smoked surface markings. This gives some amazing results which I was keen to try.


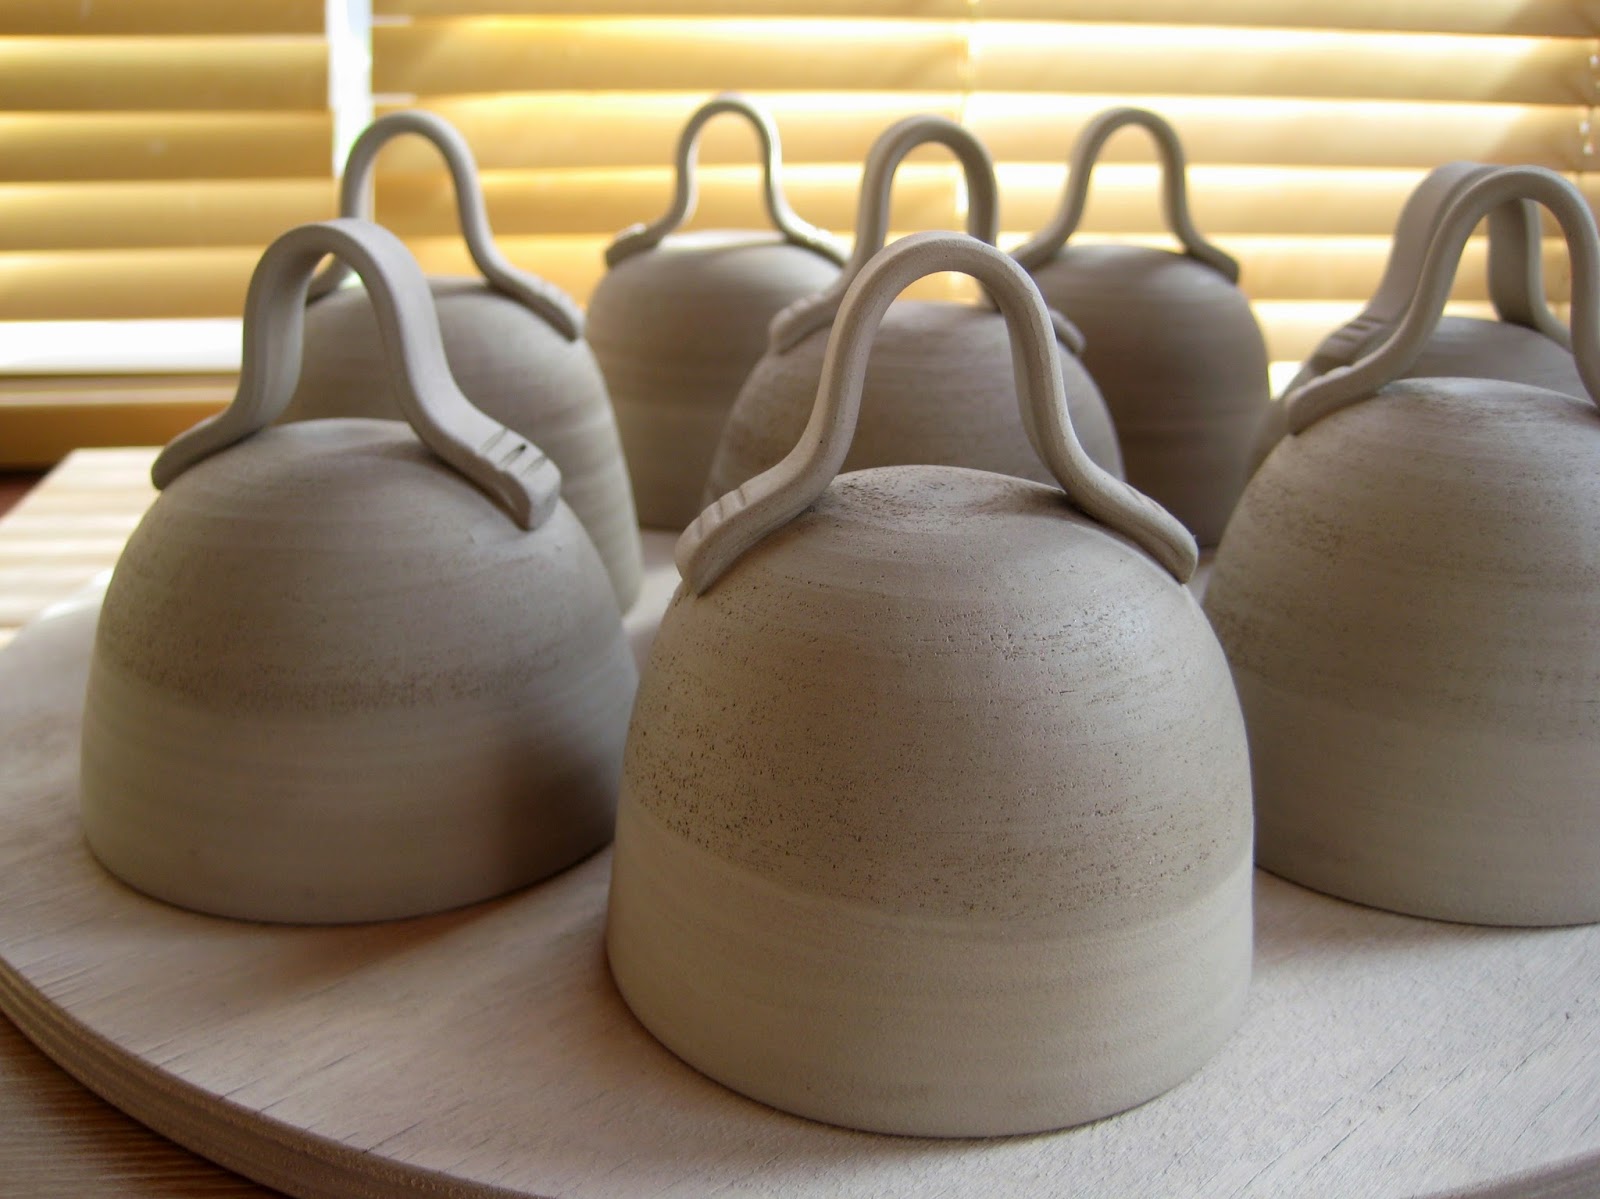
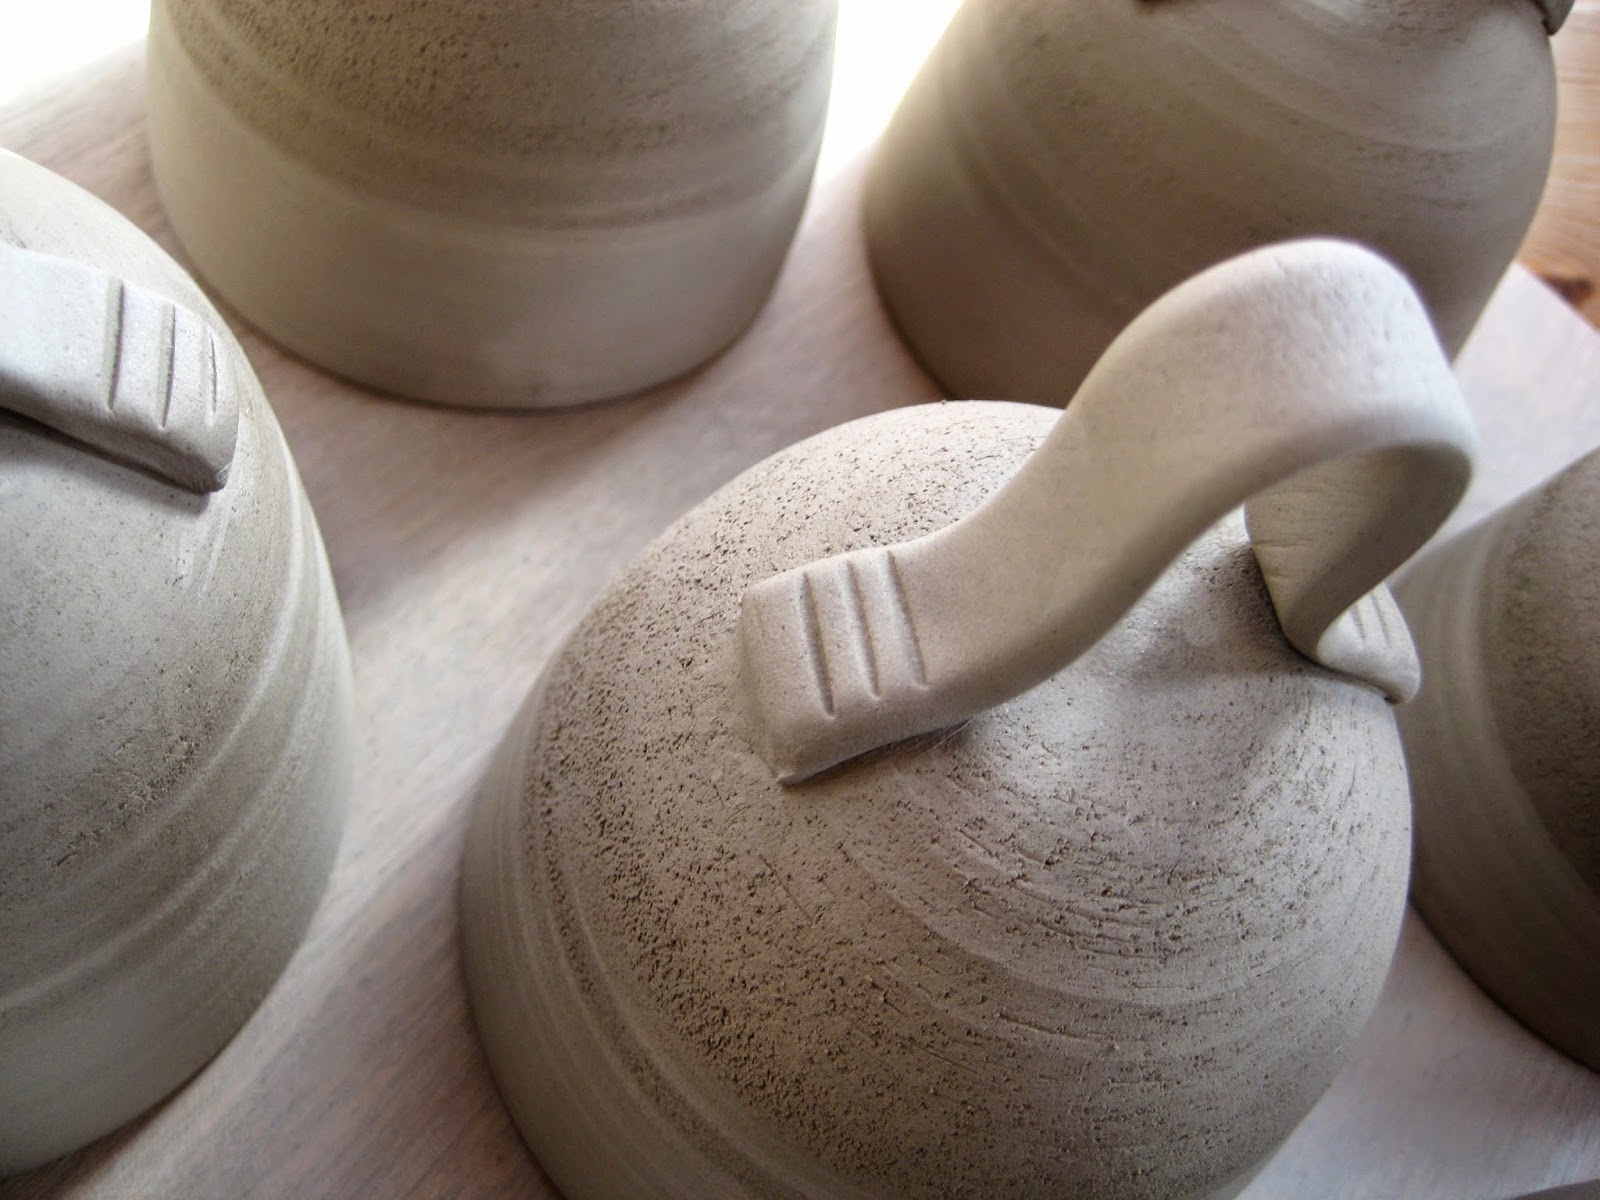
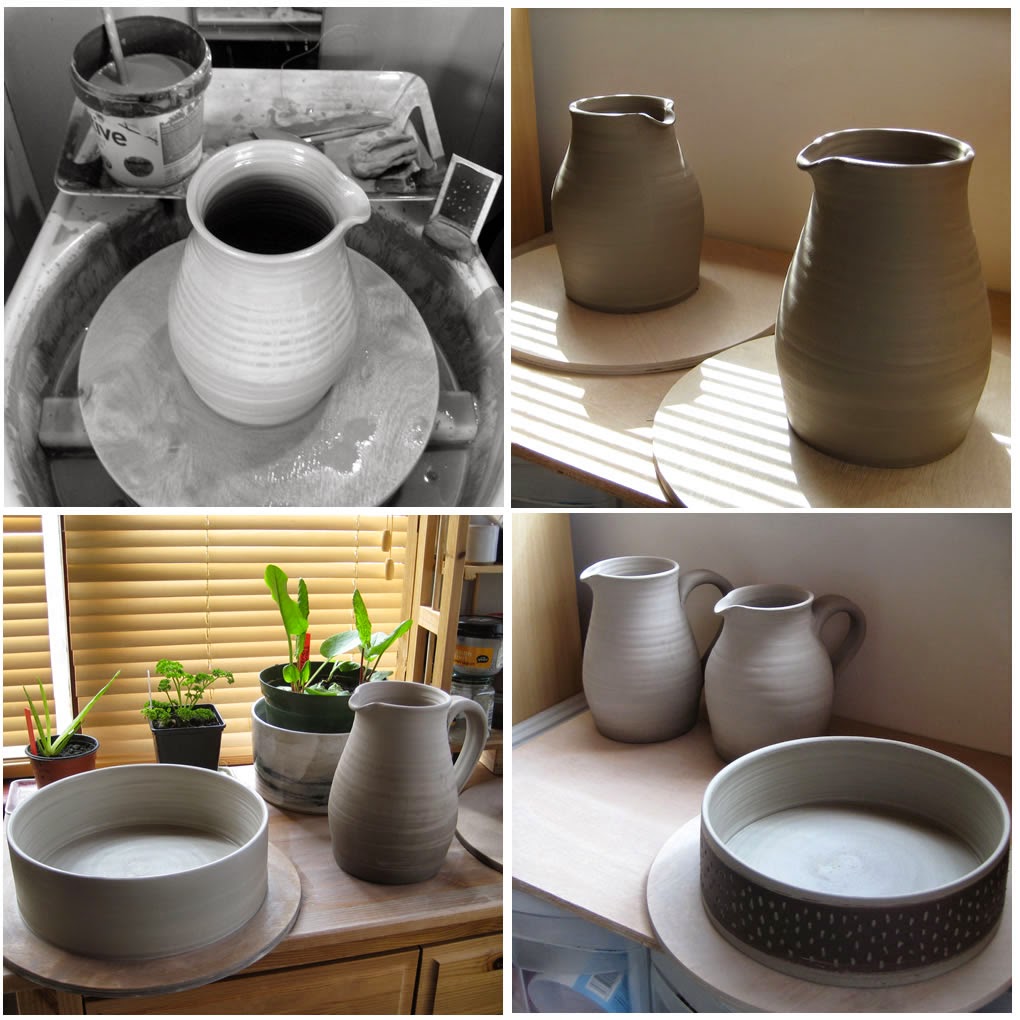
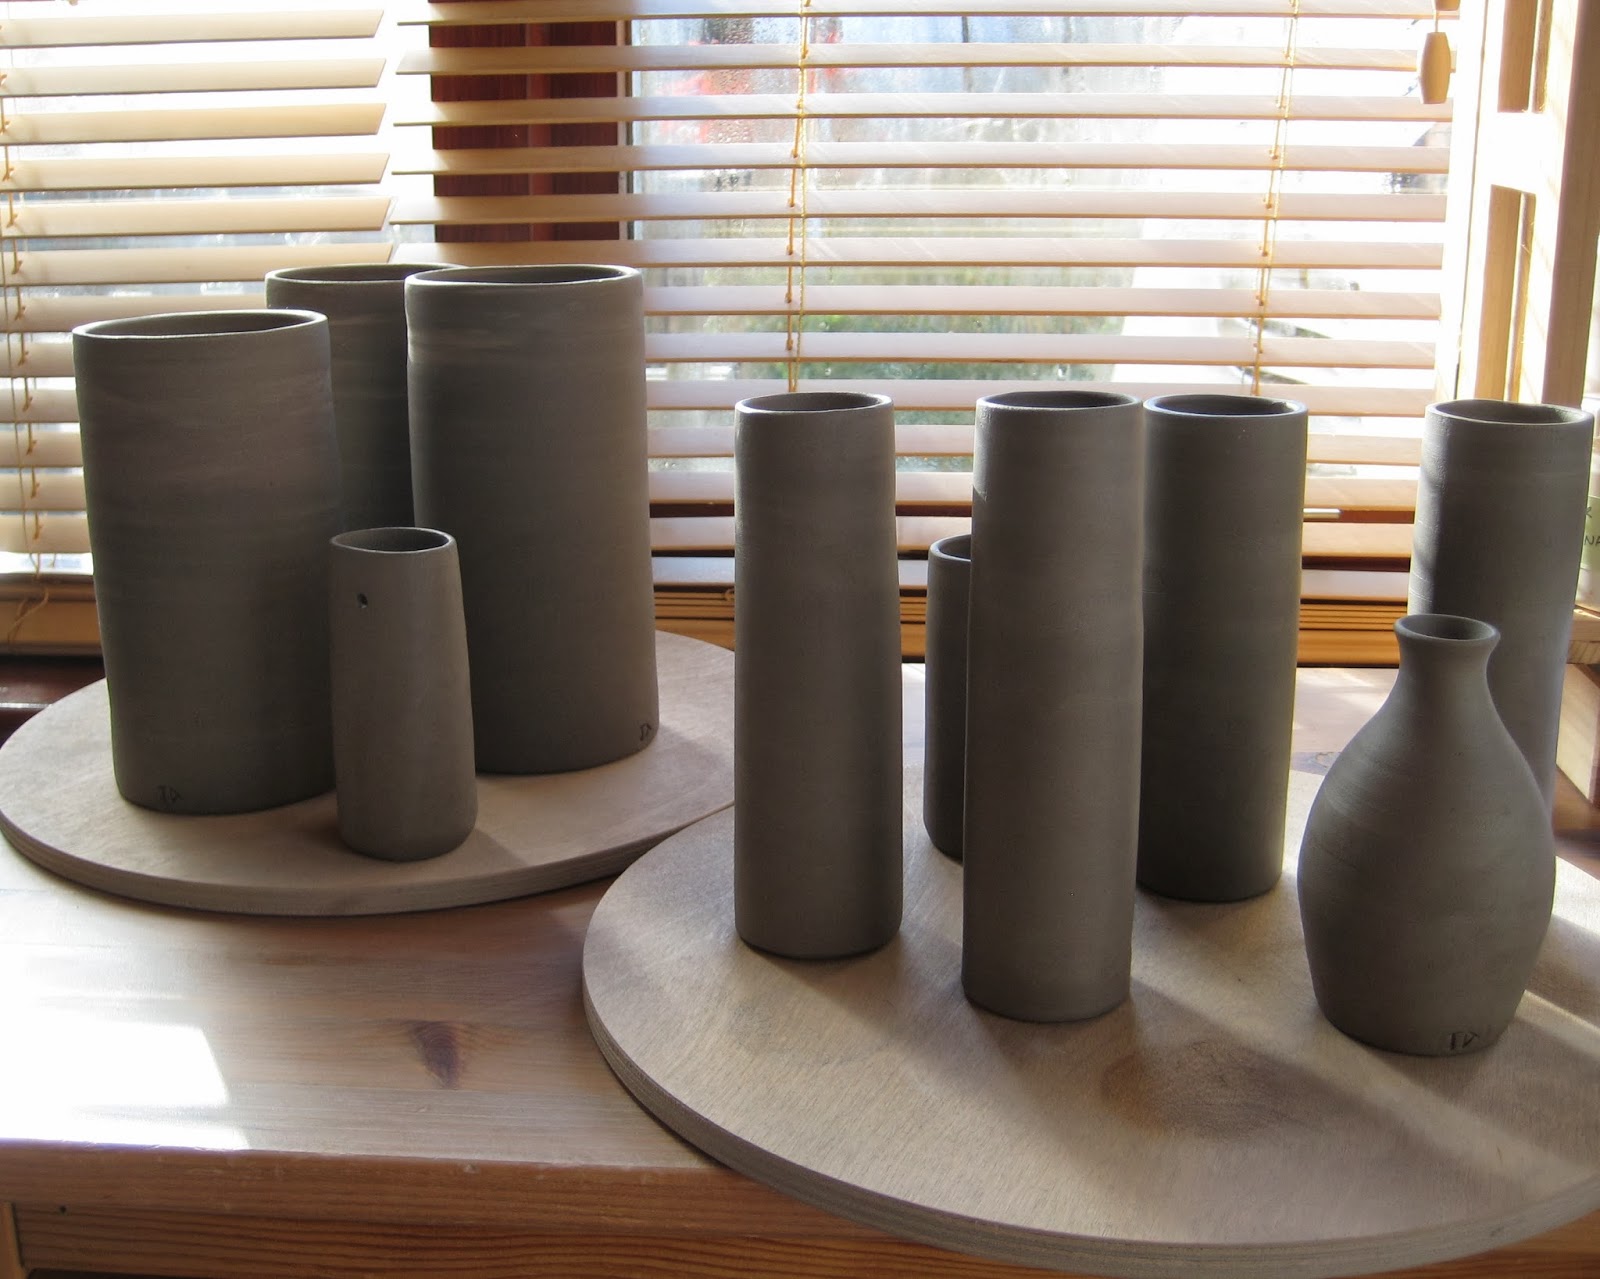
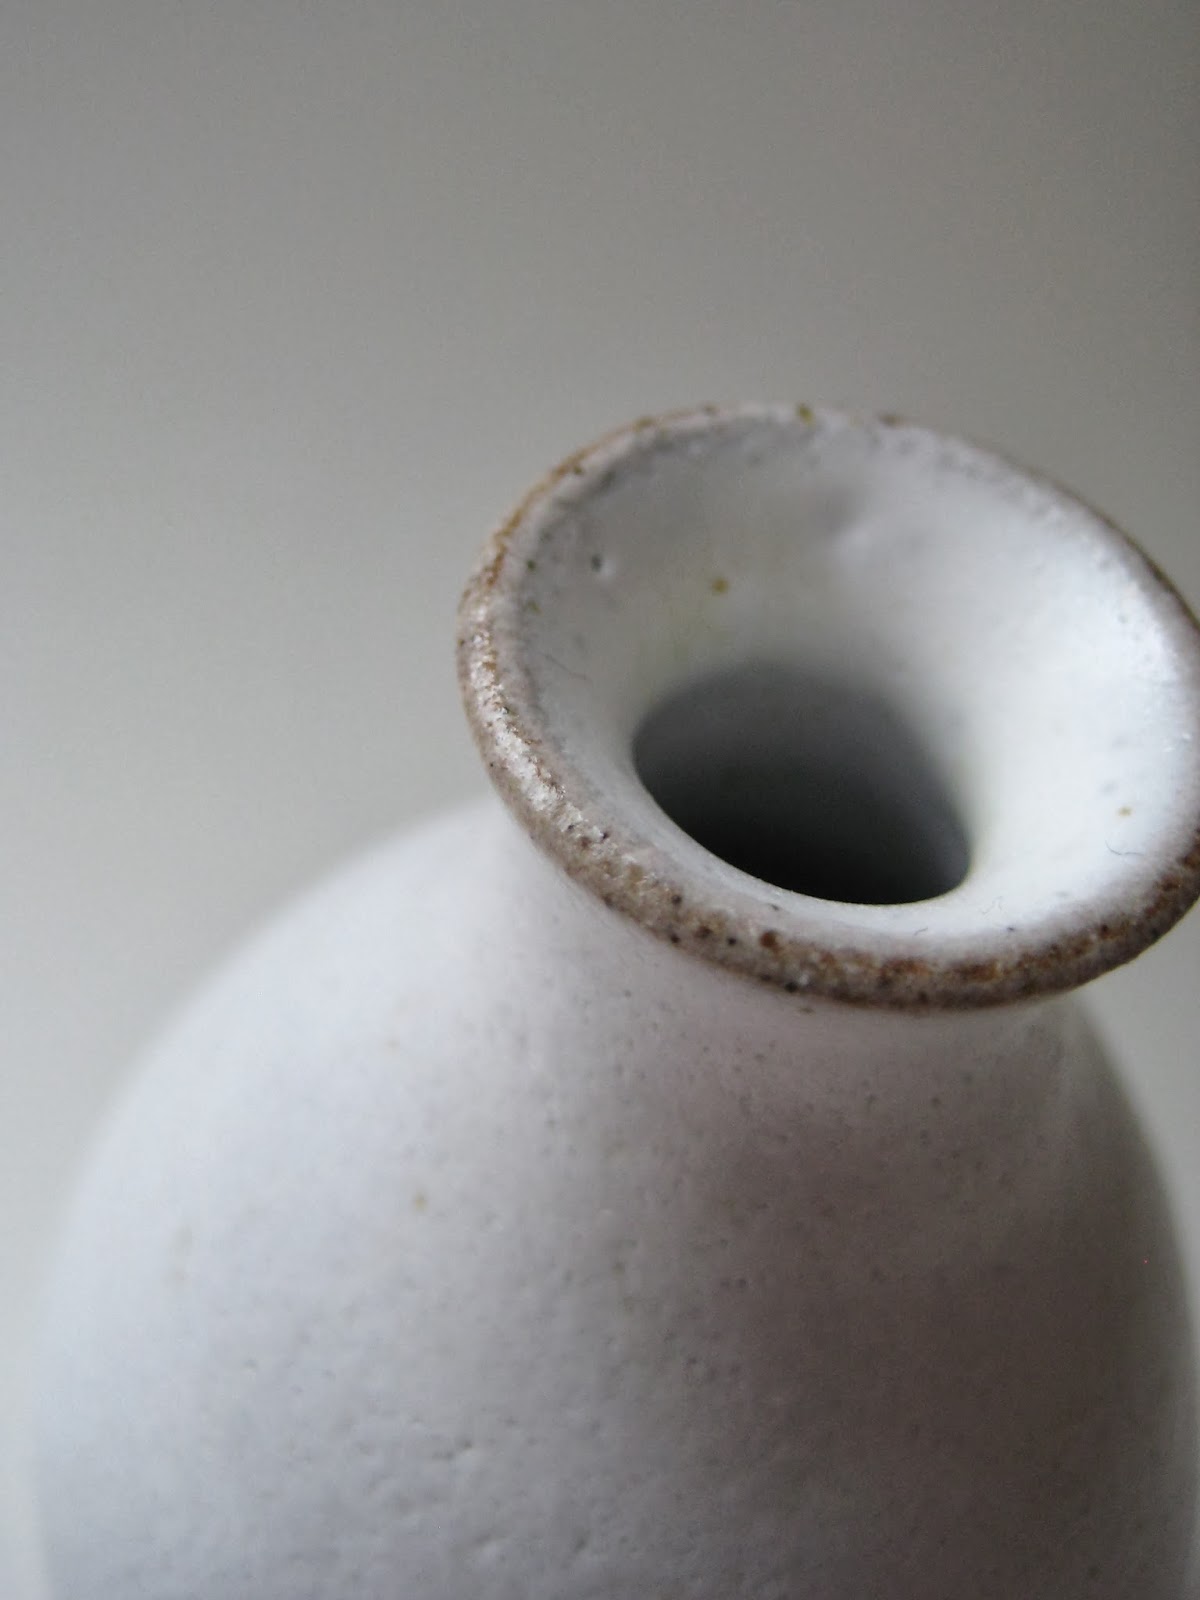
Plans for my pit firing experiment started way back in the beginning of the year. I bought some white stoneware clay to use instead of my normal buff stoneware. Smoke markings show up better on a white background. I also decided to throw some rounded forms on the wheel because this allows the flames and smoke to flow over a larger surface area. Rounded shapes also survive better in low temperature firings. This naturally led me to make a batch of pots that were inspired by seed pods - which seemed fitting as I also had to collect lots of natural materials like grasses, seed heads, sawdust and seaweed to add as combustibles.


The pots were all burnished and then bisque fired (fired once) in my 'normal' electric kiln to give them a better chance of surviving the fire. The original plan was to do a pit firing in July but because the weather was extremely hot and dry for weeks (remember?!) it was too dangerous to risk lighting a fire in the garden - it was a tinderbox. So I waited until we'd had enough rain. Come September I'd managed to collect all sorts of additional materials including salt, copper (in various forms) and fruit peelings.

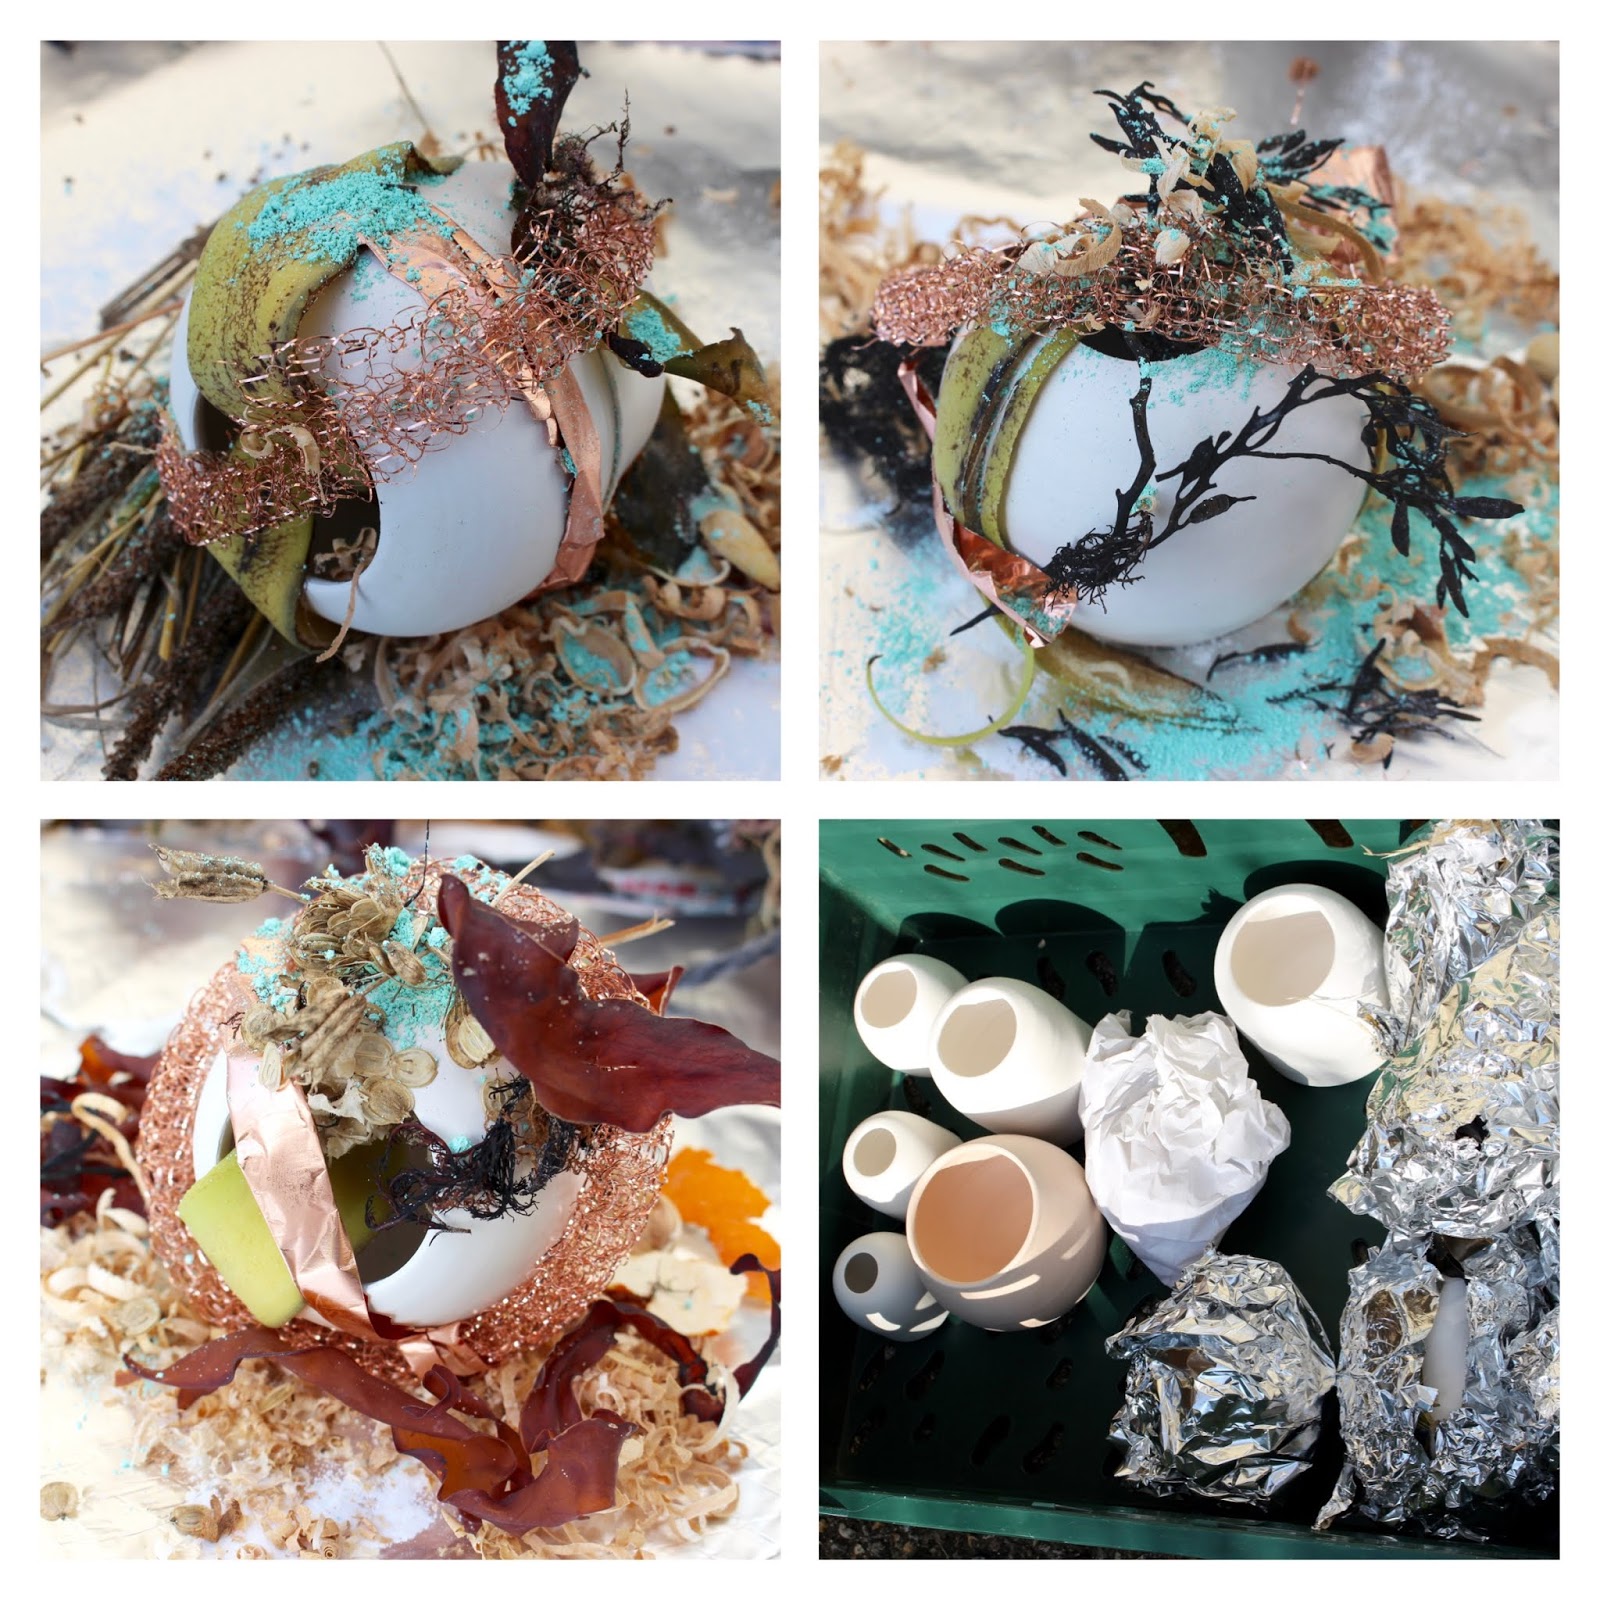
At last I had three days free to attempt a firing. The first day (very warm) was spent 'decorating' the pots. This involved packing a selection of the materials around the pot itself in the hope any chemical reactions will transfer directly onto the surface. Then I wrapped them individually in either aluminium or paper saggers. This took all day to do as I had quite a nice batch of pots and small pieces to decorate. And luckily I chose to do this outside and not in the studio because it proved to be messy. It's also nice to work outside for a change.


The next day I prepared my fire. Instead of a pit (not keen on digging a big hole!) I decided to use a barrel. It works on the same principle. So I sited my barrel and set to packing it. From then on my barrel became a 'kiln' in my head! Packing the kiln was all about reverse thinking - the fire is lit from the top not the bottom, so I have to plan the layers of sawdust, shredded paper, kindling and wood to cover the pots and to allow room for the fire.

After a shaky start (the fire smoked too much at the start and I couldn't get it to flame) at last I managed to get a good flame and fed it for about two hours. Then I closed the lid and stopped up all the gaps. I used a chimney cap on the top and wet clay as bungs. And then right on cue it started pouring with rain! But there was nothing I could do but leave it to smoke overnight.


I had no idea what to expect come morning. I was trying to stay philosophical as I walked up the garden to check on my 'kiln'. It could go either way. I lifted the lid. Warm ashes at the bottom. But also a patch of red. A red pot (you can see it in situ in the photo I took above). I picked it out and wiped off the ash to reveal a gorgeous little pod pot. And lots of others too, one after another. I was absolutely amazed and chuffed to bits at the results. And instantly, completely hooked!

The last phase in these complicated little pots was to polish them all with natural beeswax. In doing so the detail and patterns in the surface really show through. Every side of each pot has so many interesting markings that - depending on where you're looking - it can seem like a completely different pot. The marks themselves bring to mind all sorts of abstract visuals - many of the pots look to me like tiny planets or moons or a miniature cosmos. But I expect everybody will see something different in them.


All my new 'pod' pots are available in my Etsy and Folksy shops. I really enjoyed making these - they are so unique and fun to do. I'm already planning to make more next year!


Tuesday, 30 January 2018

Spring Cleaning in the Studio

Snowdrops in the garden

January is nearly over and it looks like Spring is on its way already - as you can see from the lovely snowdrops in my garden.

I've been doing a bit of Spring Cleaning. I've got a few custom orders to make so it's nice to start the New Year fresh with a clean studio. I'm quite a tidy potter (I clean as I go!) because I find it difficult to work when things are messy. So the floor, shelves and wheel needed only a wipe over to get them back to feeling brand new.

Pottery Tools

I also like to clean and sort through all my throwing and turning tools once in a while. I keep them in an old vintage wooden cutlery tray which has a handle in the centre for moving them about in one go. This box normally sits right next to me on the wheel so the whole lot gets covered in splats of clay during throwing.

As you can see in the photos, they've all been given a good clean and are (obsessively?) arranged into separate sections - throwing tools, turning tools, wooden modelling tools, kidneys, knives... I know some potters might think this is unnecessary. But I find it helps enormously to always know where the right tool is kept and also that it's going to be clean and ready to use when you need it.

Throwing Tools and Turning Tools

Once the studio has had a Spring Clean, I find it useful at this time of year to do a complete stock take. This means checking through everything I need for the pottery business including things like glaze materials, stationery items and mailing supplies. And it's also a good time to get up-to-date with all my reclaim clay which can easily build up. So now all my slop buckets are empty and ready for throwing new pots.

As for finished pots, I'm pretty low on these at the moment. Most of the pots from my last glaze kiln (which I fired on Christmas Eve and opened on Boxing Day!) have already gone to local galleries and suppliers as New Year stock. So my on-line shops are currently very sparse. But I've made a long list of pots to make - most of which are my standard ware. As you can see in the photos below, I've already made a start throwing a small batch of jugs, but I'm keen to try some new pot ideas too - hopefully you'll get to see them soon!

Small Batch of Jugs

Wednesday, 18 October 2017

Kiln Issues - A Problem with a Bisque Firing (Christmas on Hold!)

Christmas Bells Drying in the Kiln Room

I'm currently in limbo and don't know yet whether Christmas is cancelled or not! Last Sunday I packed the kiln full of pots for a bisque firing. Most of the pots are Christmas stock ready for the busy season and include a batch of Christmas Bells (see the photo above).

Everything was going well with the firing and seemed normal right up until about 550 - 600 degrees C (which was when I went to the kiln room to put the bungs in). I noticed an odd smell, but thought it was probably just an excess of steam and vapour coming out of the vent. Now the seasons have switched over, my pots are taking longer to dry. So I thought maybe some pots were a bit 'damp' when I packed the kiln, and this was causing the fumes.


Christmas Stock including Star Tea Light Holders waiting to be packed into the Kiln for Firing

It wasn't until I went to turn it off at the end of the firing a couple of hours later that I realised something had happened. Opening the kiln room door, I could see the kiln was glowing orange but the controller and electrics were dead. At this point my heart sank.

I checked the trip switch but that was fine. So something must have happened further down the line. It was evening and I'm always tired on firing day, so I felt pretty down. I was also frustrated with myself for not checking in on the kiln every hour to see progress. So I had no idea what temperature it got to before it went kaput. But the fact the kiln was glowing orange suggested that it might have got close to bisque temperature (which in my case is 1000 degrees C).

BEFORE: Four Shelves of Pots Packed for the Bisque Firing

Pottery is mostly a waiting game, so there was nothing I could do except leave it to cool. This would take at least a day and a half before I could risk cracking it open. In the meantime I must have gone through every possible scenario: explosions from damp pots, collapsed shelves, burnt out elements, frazzled electrics, mice chewing through the wires... I was preparing myself for losing all of my pots (that's a month's worth of work) and having to start again.

Finally Tuesday morning came and I opened the kiln. And this was the result (below). Unbelievably all the pots had bisque fired perfectly! Or at least it seems like they have. They all feel and look like I expect a bisque pot to be. I haven't tested any yet to see how they take on glaze, but I'm pretty sure they're fine. So I'm absolutely chuffed and relieved.

AFTER: Success! Bisque Fired Pots (against the odds)

I also discovered that my isolation switch for the kiln had cracked and a part of the plastic casing has melted. Probably this was the source of the smell. Everything else 'looks' fine (elements, thermocouple, wiring) so I have all my fingers crossed that it was just the switch. I have to wait again though (until next week) before I can get a new isolation switch fitted and have the kiln checked out. So the saga isn't over.

But I now have a new appreciation for my kiln! I suddenly think it's a legend for doing so well and getting all my pots safely through to bisque. I've decided as soon as I get the kiln running again I'm going to make something in thanks: the kiln gods need an offering...

Saturday, 16 April 2016

Modern Stoneware Beakers: Monty's Vintage Shop Blog Feature


Back in January in my last blog post I was throwing an order of beakers. Well since then I've been so busy (as usual) I've hardly had time to show off any of the things I've been up to. But today (while I'm waiting for the latest kiln to cool) I thought I'd at least mention what happened to those beakers...


After throwing them, I turned the bases next day and then brushed blue/black slip around the outside. To create a 'dotted line' pattern I then scratched through this slip to reveal the lighter coloured clay underneath: a technique called 'sgraffito' (which always requires a spellcheck.)

After firing them in the bisque kiln, I then glazed them in clear glaze both inside and out. I did have photos of this too - but it was so dark on the day they all looked out of focus. Instead, below is a photo of the order after the final glaze firing.


Since then my beakers have been featured in a lovely post on Monty's Vintage Shop Blog (a screen grab is seen at the top of this post). So I just wanted to say thanks again to Rebecca for doing such a great feature and showing off my beakers (which are now her beakers) to their best!  

I also thought this was a perfect opportunity to try out Etsy's new Shop Update feature. So I posted my first update today featuring my beakers. Here's the photo with the Etsy Tag. I currently have two of these available in my shop - just click on the pic for a link!


Friday, 1 January 2016

New Year, New Beginnings


It's New Year's Day today and I'm starting as I mean to go on! It's been a really busy Christmas season and my stock of pots is very low. But before I can re-stock I have some orders to complete - in fact the first kiln of the year is already booked up! So I've been throwing some beakers today as part of an order of 20.

Today has been the first chance I've had to get on the wheel in quite a while - and it's good to get back to making. The photo above shows how dark it is in the studio at the moment, even in the middle of the day.

Anyway, it's just a quick post today really, to say I'm still here! I left the blog alone for quite a few weeks I notice during all the Christmas rush - there was just no time to keep posting. Things have calmed down a little in the last few days though and so I'm looking forward now to getting back into making some new pots for the New Year.

Happy 2016!


Sunday, 3 May 2015

Spring Things - Making Bells, Jugs and Bowls

The kiln is on again. This time another bisque. It seems the only time I write a blog post these days is when the kiln is on! But I've been taking photos of some of the things I've been making this past month. Above and below are a batch of new bells or wind chimes I've made for an order. As you can see, each one is handthrown on a wheel just like a bowl and then the base is turned and rounded off. Then I attach little strap handles for hanging them up in the garden or for holding as a hand bell.

These chimes were featured in a great blog post on Remodelista back in March - so they've proved a bit of a hit lately (I've sold out at the moment.) These ones are in the kiln as I speak ready to be glazed hopefully in a few days time.

I've also been making a batch of large jugs for another order and a few one-off pieces including some low cylinder bowls suitable as fruit bowls or serving bowls. Everything was going swimmingly for a while and I made quite a few pieces when suddenly the weather changed. Spring arrived overnight and we had a very dry, warm spell which meant all the pots started drying out too quickly...

Normally during winter I can leave pots out in the studio uncovered and they can dry out nice and slowly in the damp atmosphere. But I took my eye off the ball and forgot to cover the pots overnight when the weather changed...and before I knew it, handles were cracking off and bottoms were splitting! Sometimes it's so easy to forget the obvious stuff. So I lost about four big pots: I had to hit them with hammers to break them up and put them in the recycling bucket. All very upsetting and disappointing, especially as I had to make them all over again!

Above are photos of the doomed pots! The ones that got away. I forgot to photograph the damage (it was much too traumatic). But I've remade all these now and fingers crossed they've dried out properly this time and they're in the kiln being bisque fired as I type.

Finally, here's some little porcelain eggs I made especially for Spring this year. They come in three colours: plain white, pale blue and sage green. Inspired by the little blackbirds I starting making last year, I thought I'd make some eggs to go with them. And because you can't have eggs on their own, I've hand knitted and felted some little nests for them too. These are made using a gorgeous soft Alpaca wool sourced locally on the Isle of Wight. The result is a very cute little set available in my Folksy and Etsy shops. Enjoy!


Sunday, 16 March 2014

Three Tall Jugs - Throwing, Making Handles and Taking Photos

Last week I made three tall jugs and decided I'd try to remember to take photos along each of the stages of making - from throwing to attaching handles. This is actually harder than it sounds! Sometimes when you get into the 'creative zone' you forget all about taking photos. And pottery is a messy business: there's water and wet clay everywhere and consequently a huge potential for accidentally dropping a digital camera into a bucket of sludge... (Thankfully, I didn't do that by the way!)

Tall Jug - On the Wheel on a Wooden Batt
Tall Jug - On the Wheel, Lip Formed
The other reason why it's sometimes difficult to remember to take photos is that pottery doesn't happen in just one day. The initial stages of making a pot - especially a hand-thrown one - can take several days: by which time the plan to take photos can slip the mind. Above you can see two photos I remembered to take (!) after finishing throwing the first of these jugs. They show the jug still on the wheel, freshly thrown and still on its wooden batt. As you can see, I've finished forming the jug and even put in the lip. I've also cleaned off the batt with a sponge - because when throwing it gets covered in slip clay.

First Jug - Off the Wheel (and Mugs Drying!)

Three Tall Jugs on Batts
The next stage is to take the jugs off the wheel and put them aside to start drying out. This is what the wooden batts are for: they allow a larger thrown pot to come off the wheel supported on their own surface so they don't lose their shape when being moved. Then I simply put the next batt on the wheel and throw the next jug. The above photos show the freshly thrown jugs drying out still on their batts (also some mugs drying upside-down in the background!) No photos of the actual throwing process itself though...

Attaching Handles
Cut to the following day and the jugs were still very wet. It was late afternoon before they could be persuaded to come off the batts at all (using a wire). Then I could begin to 'turn' the bases. This involved putting them back on the wheel upside down and trimming the bottoms to tidy them up. And just to prove my earlier point about forgetting to take photos I forgot to take any of this particular stage! In fact overall it was a frustrating day. The weather was dampish so everything was taking ages to dry and I had to use a hair drier on the pots (which I don't like to do) to try to hurry things along. It was late in the evening before either the jugs or their intended handles (which I made for them that day) were ready for me to attach and put together. Hence the only photo I remembered to take was this one above - a bit late in the evening when it was dark and I had the very last handle to add!

Three Tall Jugs - Drying

Three Tall Jugs - And Oxide Decoration
And then it's two days later before I remember to take any more photos! In the meantime the jugs were positioned upside-down on their rims to allow the handles time to dry onto the body of the pots. In this position gravity helps keep the handles 'stuck on' and discourages them from cracking away at the join. Of course then the weather changed that day and became sunny and warmer - so I worried the jugs might dry out too quickly! To avoid this I draped plastic over them to keep them damp.

Above are two photos showing the three jugs safely attached to their handles. At this stage I was confident enough to put them right-way-up again and take off the plastic to let them air dry. The pot on the left though you may notice has some decoration added to it. I've brushed on an oxide mix around the top rim and down the handle. Proof yet again that I forgot to take photos and completely missed out another stage of making! Oh well, another time.


Thursday, 6 February 2014

Tealights, Hearts and Valentine's


Making pots can be a fiddly process, especially when you start cutting holes into clay. You have to make sure the pots are wet enough not to bend or buckle under the pressure of cutting, but also not too dry or you risk cracking the clay. So when I decided to make these new tealight holders with a cut-out heart motif, I knew I'd be spending a long afternoon muttering to myself!


The hearts were made using a normal heart shaped cookie cutter - and the holes with normal hole cutters. Hole cutters are designed to make holes in clay of course, so they're fairly straightforward to use. But cookie cutters are generally expected to be used on a flat surface, cutting into dough or pastry. To use them on an elevated, curved wall - like a pot - requires a bit of care. But as long as you take time and put even pressure on the cutter whilst supporting the clay at the back, they cut quite cleanly. 


In a perfect world, the heart-shaped leftover cuts-outs could be used for making my double heart decorations (below). I've been making these little hearts for quite a few years now. They're popular as little gifts for people all year round; as gift tags, decorations, keepsakes and love tokens. But unfortunately the leftovers from the tealight holders were just too distorted (after all they'd been through) to re-use; so instead they had to go in the recycling!


But I'm pleased with my new tealight design. You may remember I made an earlier version a few years ago which was essentially the same, except instead it featured a series of different sized round holes. I think this new version with the heart motif gives them a different character: and it's always nice to give customers options. From my point of view it's also good to keep developing an existing design by returning to it and re-freshing it. Then you don't feel like you're making the same thing forever!


Luckily all my new heart motif tealight holders came out of the kiln safe and sound - just in time for me to put them in my Folksy and Etsy shops for Valentine's! Hope you enjoy them.


Friday, 24 January 2014

New Beginnings and New Bud Vases


Yesterday I fired the first kiln load of the year! I've been busy since the beginning of January trying to make enough pots to fill a bisque kiln. It hasn't been easy, especially since the studio roof has been leaking (again!) in all this wet and windy weather. During one particularly heavy downpour, I even decided to wear my waterproofs indoors to avoid the drips... The general atmosphere has also been so damp, the pots have taken ages to dry. But, moaning about the weather aside and despite everything, I managed to get the kiln going yesterday for my first bisque - and so today (while I'm waiting for the kiln to cool down) I thought I'd blog about some new pots I've been making.


Before Christmas I started to throw a few new vase shapes. I wanted to make some small bud vases with a belly form and also some straight slim and narrow 'stem' vases. Above is a photo of the first small test batch I made before Christmas (shown in leatherhard stage and drying out). They're all hand-thrown as usual, but the straight narrow vases have been thrown in two parts: two thrown 'tubes' which are then spliced together when they're both leatherhard. This sort of making is called composite making, and it's something I've started to experiment with. It's especially useful for making taller pots and for making narrow forms (for when your fingers can't fit inside the pot during throwing).


I've started to list a couple of these finished pots in my Etsy and Folksy Shops - and hope to add the rest in the coming weeks. All being well, there should also be more narrow vases in the same style from this first bisque kiln - once I've glazed them and fired them again of course. But I'm very pleased with this first selection and I'm looking forward to developing the theme further this year. Hopefully it's going to be a great new year with lots of new pots!


Thursday, 3 October 2013

How to Make a Wood Ash Glaze

Glaze Mixing
Over the summer I've been doing lots of glaze testing, and one of these has been to find my own Wood Ash Glaze recipe. It's not an easy process. I gathered together several recipes found in pottery books. All of them had a different take on the process - and sometimes conflicting ideas! I tried out four of the recipes with varying success, but now I think have my own version.

Wood Ash

The first thing I had to do was get a source of wood ash. You need at least a kilo of good grey/white ash with as little rubbish in it as possible: the sort you get after a long hot fire. Luckily my sister happened to have some. This came from a mixture of wood species (Cherry, Eucalyptus and general woody plants from the garden) that had been pruned and burned over the previous summer in a chiminea. This meant the ash was very clean and without contaminants like soil, which you might get from a ground fire. Anyway, my sister had collected all this ash in a bucket with the intent on using it to mulch the raspberries; but instead I jumped in and she very kindly let me have it!

First of all I had to clean the ash. This I did by sieving it to get rid of any last bits of twig, stone, carbonised lumps, leaves etc. I sieved it twice using the same sort of sieve as a normal kitchen/household size rather than a glazing sieve: and I wore gloves, goggles and a mask by the way as this stuff isn't too good for you if inhaled. The photo above shows the powder that was left. As you can see it looks very clean. I decided it looked good enough to use just as it was. Many books talk about washing the ash by soaking it, rinsing it and then drying it back to a powder. But this sounded obsessive and unnecessary to me! Instead I decided to use this powder as the dry ingredient in a recipe like any other.

Sieving The Glaze

After lots of little test batches, I decided on my final recipe. This is based on one found in Stephen Murfitt's The Glaze Book. The main ingredients are:

Wood Ash 38
Feldspar 30
China Clay 20
Flint 12

Although I've also added a percentage of Red Iron Oxide. 

After measuring out the ingredients precisely using an electronic scale, I put everything straight into a bucket of water. Then stir! Simple really. Although it would be if I wasn't wearing goggles, a mask and gloves (the donning of which always seems to bring on fits of sneezing...) The pictures above show just a few stages of making up the glaze mixture, which include sieving it at least three times using a 60 mesh glazing sieve. The result is the lovely rose-pink colour of the raw glaze mixture in the last photo.

Dipping Pots

And then it's just a matter of glazing some pots. Above are a couple of photos showing me dipping a jug into the freshly made Wood Ash Glaze. And below are some photos of the latest batch of pots in their raw glazed state, ready to be packed into the kiln...

Jug with Wood Ash Glaze
Glazed Pots Waiting for the Kiln


At the moment I have no idea if these pots have worked. As I type, I'm actually waiting for the kiln to cool down enough so I can open it and see the final results. It's a bit of a nervous waiting game: it could go either way. Below is a test tile of what the glaze looked like during the testing stages. As you can see, it's a very nice simple wood ash glaze fired in an electric kiln. But tests are only tests, and glazes can behave completely differently when put on a pot. So we'll just have to wait and see...

Wood Ash Glaze Test Tile


Friday, 28 June 2013

Pots That Pour: New Pouring Jugs and Bowls

New Pourers

Just a quick blog about pots that pour! I do enjoy making pots with pouring lips. There's something about adding a lip to a shape that instantly transforms it into a pot with purpose. It seems to say 'look, you can pour stuff out!' and that makes people identify with them, and imagine all sorts of ways of using them. Also, a pouring lip gives a pot a sense of character - a bit of personality.

Above are my newest pouring jugs. These are a variation on my 'tip jug' - in other words jugs without handles. These are a bit taller and straighter in design and measure about 6.5cm high (that's about 2.5 inches or so). Dispensing with the handle makes using these jugs an even more tactile experience - they feel so nice in the hand and they're easy to grab and use. Sometimes handles can actually get in the way of function; because you have to turn the jug around to get at them. These little jugs are just grab and go! They're available for sale now in my Etsy Shop.

Freshly Thrown Pouring Bowls

And here's my latest 'pots that pour': some new pouring bowls. These are a larger size to go with my drizzle bowls and 'medium' pouring bowls. As you can see they're freshly thrown in the picture - still on their batts. Since then I've turned the bases and they're now drying in the studio. But in the meantime, here's some photos of my smaller sized pouring bowls. I took these recently for listing in my Esty and Folksy shops. Hope you enjoy them!

Pouring Bowls, Drizzle Bowls