Showing posts with label Methods. Show all posts

Sunday, 18 November 2018

Pit Firing 2018


Back in September I tried out an alternative firing technique called pit firing. Although I enjoy using my electric kiln, it's fun to try something different now and again. I used to fire using a raku method but my last firing was seven years ago. Since then I moved house and now have a garden with enough space to try some firing experiments. Time to play with fire!

Pit firing (also known as smoke/sawdust/barrel firing) is a low temperature firing technique with origins in ancient methods of firing pots. Traditionally people stacked pots into a pile or pit in the ground, covered them in wood and other combustibles before setting alight. Instead of using glazes, chemicals found in the combustible materials react in the firing to create smoked surface markings. This gives some amazing results which I was keen to try.


Plans for my pit firing experiment started way back in the beginning of the year. I bought some white stoneware clay to use instead of my normal buff stoneware. Smoke markings show up better on a white background. I also decided to throw some rounded forms on the wheel because this allows the flames and smoke to flow over a larger surface area. Rounded shapes also survive better in low temperature firings. This naturally led me to make a batch of pots that were inspired by seed pods - which seemed fitting as I also had to collect lots of natural materials like grasses, seed heads, sawdust and seaweed to add as combustibles.


The pots were all burnished and then bisque fired (fired once) in my 'normal' electric kiln to give them a better chance of surviving the fire. The original plan was to do a pit firing in July but because the weather was extremely hot and dry for weeks (remember?!) it was too dangerous to risk lighting a fire in the garden - it was a tinderbox. So I waited until we'd had enough rain. Come September I'd managed to collect all sorts of additional materials including salt, copper (in various forms) and fruit peelings.

At last I had three days free to attempt a firing. The first day (very warm) was spent 'decorating' the pots. This involved packing a selection of the materials around the pot itself in the hope any chemical reactions will transfer directly onto the surface. Then I wrapped them individually in either aluminium or paper saggers. This took all day to do as I had quite a nice batch of pots and small pieces to decorate. And luckily I chose to do this outside and not in the studio because it proved to be messy. It's also nice to work outside for a change.


The next day I prepared my fire. Instead of a pit (not keen on digging a big hole!) I decided to use a barrel. It works on the same principle. So I sited my barrel and set to packing it. From then on my barrel became a 'kiln' in my head! Packing the kiln was all about reverse thinking - the fire is lit from the top not the bottom, so I have to plan the layers of sawdust, shredded paper, kindling and wood to cover the pots and to allow room for the fire.

After a shaky start (the fire smoked too much at the start and I couldn't get it to flame) at last I managed to get a good flame and fed it for about two hours. Then I closed the lid and stopped up all the gaps. I used a chimney cap on the top and wet clay as bungs. And then right on cue it started pouring with rain! But there was nothing I could do but leave it to smoke overnight.


I had no idea what to expect come morning. I was trying to stay philosophical as I walked up the garden to check on my 'kiln'. It could go either way. I lifted the lid. Warm ashes at the bottom. But also a patch of red. A red pot (you can see it in situ in the photo I took above). I picked it out and wiped off the ash to reveal a gorgeous little pod pot. And lots of others too, one after another. I was absolutely amazed and chuffed to bits at the results. And instantly, completely hooked!

The last phase in these complicated little pots was to polish them all with natural beeswax. In doing so the detail and patterns in the surface really show through. Every side of each pot has so many interesting markings that - depending on where you're looking - it can seem like a completely different pot. The marks themselves bring to mind all sorts of abstract visuals - many of the pots look to me like tiny planets or moons or a miniature cosmos. But I expect everybody will see something different in them.


All my new 'pod' pots are available in my Etsy and Folksy shops. I really enjoyed making these - they are so unique and fun to do. I'm already planning to make more next year!


Saturday, 16 April 2016

Modern Stoneware Beakers: Monty's Vintage Shop Blog Feature


Back in January in my last blog post I was throwing an order of beakers. Well since then I've been so busy (as usual) I've hardly had time to show off any of the things I've been up to. But today (while I'm waiting for the latest kiln to cool) I thought I'd at least mention what happened to those beakers...


After throwing them, I turned the bases next day and then brushed blue/black slip around the outside. To create a 'dotted line' pattern I then scratched through this slip to reveal the lighter coloured clay underneath: a technique called 'sgraffito' (which always requires a spellcheck.)

After firing them in the bisque kiln, I then glazed them in clear glaze both inside and out. I did have photos of this too - but it was so dark on the day they all looked out of focus. Instead, below is a photo of the order after the final glaze firing.


Since then my beakers have been featured in a lovely post on Monty's Vintage Shop Blog (a screen grab is seen at the top of this post). So I just wanted to say thanks again to Rebecca for doing such a great feature and showing off my beakers (which are now her beakers) to their best!  

I also thought this was a perfect opportunity to try out Etsy's new Shop Update feature. So I posted my first update today featuring my beakers. Here's the photo with the Etsy Tag. I currently have two of these available in my shop - just click on the pic for a link!


Sunday, 16 March 2014

Three Tall Jugs - Throwing, Making Handles and Taking Photos

Last week I made three tall jugs and decided I'd try to remember to take photos along each of the stages of making - from throwing to attaching handles. This is actually harder than it sounds! Sometimes when you get into the 'creative zone' you forget all about taking photos. And pottery is a messy business: there's water and wet clay everywhere and consequently a huge potential for accidentally dropping a digital camera into a bucket of sludge... (Thankfully, I didn't do that by the way!)

Tall Jug - On the Wheel on a Wooden Batt
Tall Jug - On the Wheel, Lip Formed
The other reason why it's sometimes difficult to remember to take photos is that pottery doesn't happen in just one day. The initial stages of making a pot - especially a hand-thrown one - can take several days: by which time the plan to take photos can slip the mind. Above you can see two photos I remembered to take (!) after finishing throwing the first of these jugs. They show the jug still on the wheel, freshly thrown and still on its wooden batt. As you can see, I've finished forming the jug and even put in the lip. I've also cleaned off the batt with a sponge - because when throwing it gets covered in slip clay.

First Jug - Off the Wheel (and Mugs Drying!)

Three Tall Jugs on Batts
The next stage is to take the jugs off the wheel and put them aside to start drying out. This is what the wooden batts are for: they allow a larger thrown pot to come off the wheel supported on their own surface so they don't lose their shape when being moved. Then I simply put the next batt on the wheel and throw the next jug. The above photos show the freshly thrown jugs drying out still on their batts (also some mugs drying upside-down in the background!) No photos of the actual throwing process itself though...

Attaching Handles
Cut to the following day and the jugs were still very wet. It was late afternoon before they could be persuaded to come off the batts at all (using a wire). Then I could begin to 'turn' the bases. This involved putting them back on the wheel upside down and trimming the bottoms to tidy them up. And just to prove my earlier point about forgetting to take photos I forgot to take any of this particular stage! In fact overall it was a frustrating day. The weather was dampish so everything was taking ages to dry and I had to use a hair drier on the pots (which I don't like to do) to try to hurry things along. It was late in the evening before either the jugs or their intended handles (which I made for them that day) were ready for me to attach and put together. Hence the only photo I remembered to take was this one above - a bit late in the evening when it was dark and I had the very last handle to add!

Three Tall Jugs - Drying

Three Tall Jugs - And Oxide Decoration
And then it's two days later before I remember to take any more photos! In the meantime the jugs were positioned upside-down on their rims to allow the handles time to dry onto the body of the pots. In this position gravity helps keep the handles 'stuck on' and discourages them from cracking away at the join. Of course then the weather changed that day and became sunny and warmer - so I worried the jugs might dry out too quickly! To avoid this I draped plastic over them to keep them damp.

Above are two photos showing the three jugs safely attached to their handles. At this stage I was confident enough to put them right-way-up again and take off the plastic to let them air dry. The pot on the left though you may notice has some decoration added to it. I've brushed on an oxide mix around the top rim and down the handle. Proof yet again that I forgot to take photos and completely missed out another stage of making! Oh well, another time.


Thursday, 3 October 2013

How to Make a Wood Ash Glaze

Glaze Mixing
Over the summer I've been doing lots of glaze testing, and one of these has been to find my own Wood Ash Glaze recipe. It's not an easy process. I gathered together several recipes found in pottery books. All of them had a different take on the process - and sometimes conflicting ideas! I tried out four of the recipes with varying success, but now I think have my own version.

Wood Ash

The first thing I had to do was get a source of wood ash. You need at least a kilo of good grey/white ash with as little rubbish in it as possible: the sort you get after a long hot fire. Luckily my sister happened to have some. This came from a mixture of wood species (Cherry, Eucalyptus and general woody plants from the garden) that had been pruned and burned over the previous summer in a chiminea. This meant the ash was very clean and without contaminants like soil, which you might get from a ground fire. Anyway, my sister had collected all this ash in a bucket with the intent on using it to mulch the raspberries; but instead I jumped in and she very kindly let me have it!

First of all I had to clean the ash. This I did by sieving it to get rid of any last bits of twig, stone, carbonised lumps, leaves etc. I sieved it twice using the same sort of sieve as a normal kitchen/household size rather than a glazing sieve: and I wore gloves, goggles and a mask by the way as this stuff isn't too good for you if inhaled. The photo above shows the powder that was left. As you can see it looks very clean. I decided it looked good enough to use just as it was. Many books talk about washing the ash by soaking it, rinsing it and then drying it back to a powder. But this sounded obsessive and unnecessary to me! Instead I decided to use this powder as the dry ingredient in a recipe like any other.

Sieving The Glaze

After lots of little test batches, I decided on my final recipe. This is based on one found in Stephen Murfitt's The Glaze Book. The main ingredients are:

Wood Ash 38
Feldspar 30
China Clay 20
Flint 12

Although I've also added a percentage of Red Iron Oxide. 

After measuring out the ingredients precisely using an electronic scale, I put everything straight into a bucket of water. Then stir! Simple really. Although it would be if I wasn't wearing goggles, a mask and gloves (the donning of which always seems to bring on fits of sneezing...) The pictures above show just a few stages of making up the glaze mixture, which include sieving it at least three times using a 60 mesh glazing sieve. The result is the lovely rose-pink colour of the raw glaze mixture in the last photo.

Dipping Pots

And then it's just a matter of glazing some pots. Above are a couple of photos showing me dipping a jug into the freshly made Wood Ash Glaze. And below are some photos of the latest batch of pots in their raw glazed state, ready to be packed into the kiln...

Jug with Wood Ash Glaze
Glazed Pots Waiting for the Kiln


At the moment I have no idea if these pots have worked. As I type, I'm actually waiting for the kiln to cool down enough so I can open it and see the final results. It's a bit of a nervous waiting game: it could go either way. Below is a test tile of what the glaze looked like during the testing stages. As you can see, it's a very nice simple wood ash glaze fired in an electric kiln. But tests are only tests, and glazes can behave completely differently when put on a pot. So we'll just have to wait and see...

Wood Ash Glaze Test Tile


Thursday, 17 January 2013

Candleholders and Cold Clay Mornings...


Keeping warm in the winter – especially when there’s snow in the air – is tricky at the best of times. So just imagine what it’s like trying to throw pots! I always make sure I have plenty of hot water when I’m throwing – In fact it’s the first thing I do in the studio after putting on my overalls; boil the kettle for some piping hot water. But there’s no amount of comfort that can prepare you for the next stage. It’s difficult to describe just how shocking it is to plunge your bare forearms into a cold, damp plastic bag and wire off a slab of stoneware! Even if the room itself is warm enough to work in, the clay remains bone-chillingly cold in this sort of weather…

However, the show must go on! And recently (since Boxing Day in fact) I’ve been throwing regularly to try to re-stock on pots. Christmas was very good for me, but as a result I have almost nothing in stock except a few pots here and there. So I’m steadily working through a huge list of ‘priority pots’ (which at the moment feels like everything I’ve ever made!)

But it’s always good to try something new too; to keep things fresh. Above is a photo of a new design I made last week. I’ve always wanted to make candleholders but never seemed to get around to trying them out. So when I received a request recently for two candleholders with handles, I decided to have a go right away and made a small batch of six. I’m very pleased with them actually and they were fun to make too. I made them in one piece; a bit like throwing a lid with a knob. I threw the flat ‘saucer’ part first, leaving a lump of clay in the middle which I then pulled upwards into the candle ‘bowl’. Next day I gave the base a quick clean and added a small handle for carrying. And I’m looking forward to seeing how they come out – because I might be tempted to keep one for myself…

Sunday, 2 September 2012

How to Make Pottery Stamps and Seals


The weather can make all the difference to making pots. Today has been damp and drizzly and the air feels colder too, which makes drying times much longer. The jugs I threw yesterday were too damp to turn and the handles I was making for them too soft to attach. So while I waited for both jugs and handles to dry out and stiffen, I decided to make some pottery stamps.

Pottery stamps are so easy to make. The easiest method is to take a piece of clay and roll it into a ball. Flatten one side of the ball to give yourself a ‘stamp’ area, and then use wooden sticks, metal tools or any type of utensil to carve or impress designs into the clay. This is best done while the clay is on its way to becoming leatherhard, but can be done to soft clay too if you make confident marks.


Alternatively, make a cylinder shape and impress your design right around the cylinder (but not the ends). This type of stamp is called a roulette. They work by holding them at the flat ends and rolling them like a wheel into soft clay to create a continuous repeat pattern. Both types of stamp must be left to dry out thoroughly before bisque firing in the kiln. This will make them hard enough to use again and again, and as long as you look after them (and don’t drop them!) they should last years.


This is exactly the method I used to make my own pottery seal. For the first few years of making pots I used to carve my initials into bases by hand. This is time consuming however and can sometimes look scratchy, so I decided to design my own seal. At first I got distracted by the idea of having a metal seal especially made: but this seemed an unnecessary expense and not personal enough. So instead I played around with some designs before settling on my initials made using a simple handmade clay seal. As you can see in the photo above, these have been bisque fired and feature my initials in reverse. They’re both the same design but one of them is indented and the other is in relief, which gives me the option of having an ‘outward’ or ‘inward’ stamp. I’ve been using them for about five years now and all my work is stamped using them: even the smallest buttons!


Anyway, eventually the jugs and handles dried out enough for me to finish them…

Monday, 16 July 2012

Impression Vases

Impression vase - Birch Tree
I’ve been working on a new range of vases which I’ve called ‘Impression’ vases. The idea is quiet simple really – throw a vase shape and use objects to make impressions and marks in the clay while it’s still soft. These marks are then picked out and made a feature of in the design by using a combination of oxides and glazes brushed over the surface. So today I thought I’d show some photos of one particular vase during making.

Using a pebble to make marks


As you can see, I’ve the placed the vase upside-down on a wooden bat. The vase was thrown the day before this photo and the base lightly turned next day - so the clay is still quite wet. The wooden bat is resting on the wheelhead which I’m using as a banding wheel so I can see all around. And why is it upside-down? Well for some reason it’s easier to see what’s going on! I started making marks at the base of the pot and worked ‘down’ to the rim. This avoids the dangers of marks feeling ‘cramped’ at the base by running out of space and instead allows them to grow naturally ‘up’ the pot. And I’ve used a small beach pebble I’ve had for years. It’s always nice to use natural objects when making.


Oxide detail
I got the idea for this design back in November last year. I was doing a show at Quarr Abbey and in a coffee break I took some photos of the gardens and textures I found in the grounds (see post). The bark on a birch tree was particularly lovely and immediately suggested the idea to me. Of course the markings on birch bark are ‘raised’ rather than indented and the colours are much more subtle than I’ve used here: but I really like the results from this first vase and think I’d like to repeat the motif again on another piece. In the same making session I also decorated more vases using different impressions and marks, but using the same oxides and glazes. I’ve added two of these vases to my Etsy shop so far and will add more soon.

Anyway, I hope you enjoyed the photos!

Inside vase showing indents


Friday, 29 June 2012

Turning Pots Using Mirrors

New mirror opposite wheel for turning pots
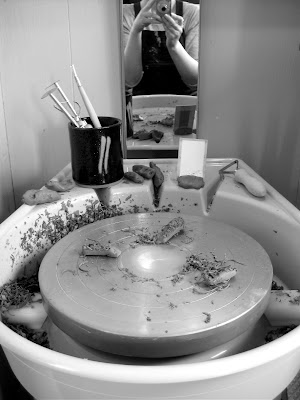
Over the past couple of weeks I’ve been trying out a new system in my studio to help me while throwing and turning pots on the wheel. I’ve had an old mirror lying around the house for years. It was taken off an unwanted wardrobe that the previous owners of our house had left behind: so you can imagine it was one of those long, tall, thin mirrors for seeing yourself full length. I had a feeling it would come in handy ‘one day’ so kept it, but hadn’t found a use for it - until now.

Recently I’ve been suffering from unexplained pain, headaches and numbness in my head and neck. A bit worrying as you can imagine, but after a couple of visits to the doctor and some serious re-assessment of my work practice, I came to the conclusion this was probably self-inflicted. I have a throwing habit that means I tend to strain my neck sideways by snapping quickly over to the right when I check the profile side of a pot. My doctor kept insisting I balance this action by checking the pot on the other side – but since there’s a wall on the left-hand side of my wheel (putting me in danger of cracking my head open) I’ve decided to ignore this suggestion entirely and instead opt for using a mirror to stop me from ‘side-checking’ altogether.


Turning pots using two mirrors
For years I used to use a small hand-mirror for throwing and turning but since I got my shimpo wheel last year I’ve dropped the habit for some reason. I know that potters are divided on the idea of using a mirror to help throw or turn. Some think using one doesn’t give a true representation of the shape of a pot and prefer the directness of seeing or touching the pot for real. I’ve always had the opinion that throwing a pot is hard enough as it is! So anything that can help or ‘ease the pain’ in the process of making a pot, is a potential tool like any other and therefore a positive thing. And after recent events I really can’t afford not to use one.

So I got the old glasscutters out and sliced my old mirror in two (it being far too tall just to lean against the wall). Luckily there was already a hole in the mirror where it used to attach to the wardrobe, and all I’ve done is screw this into the wall directly opposite my wheel. I also use my old hand mirror at a closer angle so I can get a ‘multi-mirror’ view of my pots: a bit like driving a car! Already I’ve noticed my symptoms are improving. I’m hoping that this new, safer work practice will have nipped the problem in the bud. And so far the pots are coming off the wheel quite nicely too!
Wednesday, 2 May 2012

Storage Jars - How To Make Flat Lids

At the moment life is getting in the way of making pots. This happens quite frequently of course: there’s always something popping up in life to interrupt potting plans. Recently it’s building work that’s causing disruption. We discovered the outside wall directly above my studio space was in danger of falling over in the next bad storm. And bearing in mind there’s been some pretty stormy, rainy and windy weather recently, we decided we’d better get it fixed pronto! All very boring, disruptive, noisy, dusty and stressful etc. And since it’s happening directly over my head, I’m having trouble concentrating on making pots.

However, in between the drilling and hammering and general crash of masonry falling around me, I’ve managed to do some reclaiming of clay at least and even made a few pots. As you can see in the photos, I’ve made some storage jars in the same style as my mustard pots. They have a simple cylinder design with a small ‘shelf’ area for the lid to sit on and little cut-out holes for a spoon.

The lids are thrown on the wheel from a small lump of clay. They’re made ‘right-way-up’ with the knobs included, which is a bit like making the opposite of a bowl. Instead of making a hole in the centre of the clay, you press down on the edge of the lump to create a flat lid around a central blob, which is shaped to become the knob. I’ve made this little diagram below to illustrate.


As long as you get the amount of clay right for your pot and you measure accurately when throwing, this is a very efficient design. No clay is wasted and it requires only a small amount of ‘clean-up’ when leatherhard: just a wipe over the base with a damp sponge. The holes have to be cut at the optimum time: the clay can’t be too soft or too hard or they won’t be nice and crisp. I used to use a round looped tool to make them but this time I discovered my small cookie cutter is the perfect size.

I’ve always liked storage jars, especially with lids and holes like these! And there’s something very satisfying about getting a lid to fit snugly onto a pot. Anyway, these pots are drying now and waiting to be bisque fired. In the meantime I’m hoping the building work will be over soon so I can get back to normal potting.


Sunday, 15 April 2012

New 'Bird Bowl' Pouring Bowls

I’ve been making some new products recently and thought I’d blog about one of them: so above is a photo of my new ‘bird bowl’ pouring bowls. They’re an adaptation or variation on my ‘drizzle’ bowls, which is the name I gave for small bowls with a pouring lip. (You can see posts about them here and here.) The original ‘drizzle’ bowl design was a simple bowl small enough to hold in the palm of your hand – about 8cm across by 5cm high – with a slight pouring lip: perfect for drizzling oils, dressings and spices. Having run out of these I decided to make a new batch. However, on turning day I had the idea of making this batch with little handles…

At first I toyed with the idea of designing a ‘traditional’ looped handle with just enough space for one finger to go through. But the bowls are so low, this style of handle would have felt too cumbersome and heavy. It would also have upset their centre of gravity making them susceptible to knocking over too easily. So in the end I opted for a ‘thumb’ handle: a small addition to the rim of the bowl where your thumb naturally wants to rest when pouring from the palm. It was fun trying out little shapes that might work. In the end I chose a simple, rounded shape seen below. I also added a few lined impressions using a wooden tool to give the thumb grip and to add texture and interest.


While the handles were drying ready for attaching, they reminded me of little rabbit paws: but once they were fitted to the bowl, they seemed to look like stubby tails on a small bird! So straight away I knew they’d have to be called bird bowls. I think this design of handle has worked very well. It lifts up the form and gives the bowl a very sprightly quality and makes you want to pick them up. So it’s an interesting variation, which I hope people will like.


I tried out a variety of glazes with this shape to see how they would work. In the end I’m happy with all the colour combinations and plan to repeat them and maybe try others too. I’ve glazed each bowl by dipping the whole pot into the glaze leaving just the handle, which I’ve dipped in a contrasting glaze with some overlap. The combinations so far include: white with a black tail, brown with a blue/white tail, and a lovely tin based glaze which has a creamy brown fleck contrasted with a brown tail. See? I’ve called all the handles tails…!

All three glaze combinations of bird bowls are available now in my Folksy shop.