Showing posts with label Throwing. Show all posts

Tuesday, 30 January 2018

Spring Cleaning in the Studio

Snowdrops in the garden

January is nearly over and it looks like Spring is on its way already - as you can see from the lovely snowdrops in my garden.

I've been doing a bit of Spring Cleaning. I've got a few custom orders to make so it's nice to start the New Year fresh with a clean studio. I'm quite a tidy potter (I clean as I go!) because I find it difficult to work when things are messy. So the floor, shelves and wheel needed only a wipe over to get them back to feeling brand new.

Pottery Tools

I also like to clean and sort through all my throwing and turning tools once in a while. I keep them in an old vintage wooden cutlery tray which has a handle in the centre for moving them about in one go. This box normally sits right next to me on the wheel so the whole lot gets covered in splats of clay during throwing.

As you can see in the photos, they've all been given a good clean and are (obsessively?) arranged into separate sections - throwing tools, turning tools, wooden modelling tools, kidneys, knives... I know some potters might think this is unnecessary. But I find it helps enormously to always know where the right tool is kept and also that it's going to be clean and ready to use when you need it.

Throwing Tools and Turning Tools

Once the studio has had a Spring Clean, I find it useful at this time of year to do a complete stock take. This means checking through everything I need for the pottery business including things like glaze materials, stationery items and mailing supplies. And it's also a good time to get up-to-date with all my reclaim clay which can easily build up. So now all my slop buckets are empty and ready for throwing new pots.

As for finished pots, I'm pretty low on these at the moment. Most of the pots from my last glaze kiln (which I fired on Christmas Eve and opened on Boxing Day!) have already gone to local galleries and suppliers as New Year stock. So my on-line shops are currently very sparse. But I've made a long list of pots to make - most of which are my standard ware. As you can see in the photos below, I've already made a start throwing a small batch of jugs, but I'm keen to try some new pot ideas too - hopefully you'll get to see them soon!

Small Batch of Jugs

Friday, 7 April 2017

Setting Up the New Studio

New Shelves (and Brackets!) in the Kiln Shed

It's been a busy few months setting up the new studio. In fact so much has been happening I'm not sure where to begin blogging about it! I also didn't document the process - or progress - very well, so I don't have many photos. But here's the short version of everything that's been happening.

I began setting up the studio in January. The most important thing was getting a new space for the kiln. My poor kiln was stored in the garden shed for three months wrapped in bubblewrap and tarpaulin to keep him warm and dry. Luckily the winter wasn't harsh, so in January a new kiln room could be built ready for the electrics to be installed. The Electrician was booked for the 15th of Feb, which meant Valentine's Day (the day before!) was spent preparing the new space and moving the kiln into situ.

By the way, I don't recommend spending Valentine's Day with just two of you trying to move a 17 stone kiln out of one shed into another over soft mud using improvised duckboards on a steep gradient! Luckily there was only one injury - me. I crushed the palm of my hand between the kiln and the door frame, leaving a lovely big bruise for a week. But at least the kiln was installed safe and sound!

The Kiln in its New Home - Pouring Bowl Sets Stacked for Bisque

Anyway, the kiln room is now officially up and running with some shelves/ware boards (or at least brackets for future shelves!). I also treated my kiln batts to a good clean and a fresh coat of batt wash (pictured drying out below) which I usually do once a year at the start of the new year.

Panorama of One Half of the Main Studio - Kiln Batts Drying Out

In the meantime I also made some pots of course. After being featured in Landscape Magazine, most of the pots I decided to make were custom order pouring bowl sets - as well as a few staple pots like modern pourers. This was ideal really, not only because it meant the kiln was earning its keep, but (as the forms are so well known to me) it also made it easier to get back into the flow of throwing after a break over Christmas.


Freshly Thrown Bowls on Batts - These Became Berry Bowls

In fact, it was a good idea all round to stick to familiar pots I knew how to make and I'd recommend it for a first firing in a new studio. It meant I could quickly plan how to pack the bisque kiln (which pots go where) as I've done it so many times before. It also helped with glazing too. Apart from one big bowl which I glazed in Aqua, I chose to make pots using just my white glaze so I only had to prepare two tubs - there's nothing worse than returning to an old glaze that's been quietly solidifying into an impossible cake at the bottom for three months! Also, the last thing I wanted to do was 'creative glazing' when I didn't even know if the kiln would work. So instead, I tried to keep things as simple and practical as possible.

Pouring Bowl Sets Drying

As for the rest of the studio, things are still 'ad hoc'. It's a work in progress. Things are currently 'in a place', but not necessarily in the ideal place. It's actually quite disorientating working in a new space - even when making familiar pots. Nothing is quite where you thought to remember to put it - if you get my meaning! I'd sit myself down at the wheel thinking I was ready to start when I'd realise I'd forgotten to get something basic - like water. Oh well, I'm sure it will all slot in to place eventually. But at the moment there is still so much to plan and do...

RESULTS...

By the end of March I fired the kiln for its first bisque and also its first glaze! I'm delighted to report that everything went perfectly! The bisque was perfect, the glazing all went well and the glaze firing was perfect too. It was such a relief. It had been on my mind for about a year since deciding to move house - worrying if the kiln would be OK...

Here's a few photos of the pots that came out - my first pots in my new studio.


Since then I've bought some new bags of clay and I'm ready to make more pots and fire more kilns! (Fingers crossed!)

Friday, 1 January 2016

New Year, New Beginnings


It's New Year's Day today and I'm starting as I mean to go on! It's been a really busy Christmas season and my stock of pots is very low. But before I can re-stock I have some orders to complete - in fact the first kiln of the year is already booked up! So I've been throwing some beakers today as part of an order of 20.

Today has been the first chance I've had to get on the wheel in quite a while - and it's good to get back to making. The photo above shows how dark it is in the studio at the moment, even in the middle of the day.

Anyway, it's just a quick post today really, to say I'm still here! I left the blog alone for quite a few weeks I notice during all the Christmas rush - there was just no time to keep posting. Things have calmed down a little in the last few days though and so I'm looking forward now to getting back into making some new pots for the New Year.

Happy 2016!


Sunday, 16 March 2014

Three Tall Jugs - Throwing, Making Handles and Taking Photos

Last week I made three tall jugs and decided I'd try to remember to take photos along each of the stages of making - from throwing to attaching handles. This is actually harder than it sounds! Sometimes when you get into the 'creative zone' you forget all about taking photos. And pottery is a messy business: there's water and wet clay everywhere and consequently a huge potential for accidentally dropping a digital camera into a bucket of sludge... (Thankfully, I didn't do that by the way!)

Tall Jug - On the Wheel on a Wooden Batt
Tall Jug - On the Wheel, Lip Formed
The other reason why it's sometimes difficult to remember to take photos is that pottery doesn't happen in just one day. The initial stages of making a pot - especially a hand-thrown one - can take several days: by which time the plan to take photos can slip the mind. Above you can see two photos I remembered to take (!) after finishing throwing the first of these jugs. They show the jug still on the wheel, freshly thrown and still on its wooden batt. As you can see, I've finished forming the jug and even put in the lip. I've also cleaned off the batt with a sponge - because when throwing it gets covered in slip clay.

First Jug - Off the Wheel (and Mugs Drying!)

Three Tall Jugs on Batts
The next stage is to take the jugs off the wheel and put them aside to start drying out. This is what the wooden batts are for: they allow a larger thrown pot to come off the wheel supported on their own surface so they don't lose their shape when being moved. Then I simply put the next batt on the wheel and throw the next jug. The above photos show the freshly thrown jugs drying out still on their batts (also some mugs drying upside-down in the background!) No photos of the actual throwing process itself though...

Attaching Handles
Cut to the following day and the jugs were still very wet. It was late afternoon before they could be persuaded to come off the batts at all (using a wire). Then I could begin to 'turn' the bases. This involved putting them back on the wheel upside down and trimming the bottoms to tidy them up. And just to prove my earlier point about forgetting to take photos I forgot to take any of this particular stage! In fact overall it was a frustrating day. The weather was dampish so everything was taking ages to dry and I had to use a hair drier on the pots (which I don't like to do) to try to hurry things along. It was late in the evening before either the jugs or their intended handles (which I made for them that day) were ready for me to attach and put together. Hence the only photo I remembered to take was this one above - a bit late in the evening when it was dark and I had the very last handle to add!

Three Tall Jugs - Drying

Three Tall Jugs - And Oxide Decoration
And then it's two days later before I remember to take any more photos! In the meantime the jugs were positioned upside-down on their rims to allow the handles time to dry onto the body of the pots. In this position gravity helps keep the handles 'stuck on' and discourages them from cracking away at the join. Of course then the weather changed that day and became sunny and warmer - so I worried the jugs might dry out too quickly! To avoid this I draped plastic over them to keep them damp.

Above are two photos showing the three jugs safely attached to their handles. At this stage I was confident enough to put them right-way-up again and take off the plastic to let them air dry. The pot on the left though you may notice has some decoration added to it. I've brushed on an oxide mix around the top rim and down the handle. Proof yet again that I forgot to take photos and completely missed out another stage of making! Oh well, another time.


Thursday, 17 January 2013

Candleholders and Cold Clay Mornings...


Keeping warm in the winter – especially when there’s snow in the air – is tricky at the best of times. So just imagine what it’s like trying to throw pots! I always make sure I have plenty of hot water when I’m throwing – In fact it’s the first thing I do in the studio after putting on my overalls; boil the kettle for some piping hot water. But there’s no amount of comfort that can prepare you for the next stage. It’s difficult to describe just how shocking it is to plunge your bare forearms into a cold, damp plastic bag and wire off a slab of stoneware! Even if the room itself is warm enough to work in, the clay remains bone-chillingly cold in this sort of weather…

However, the show must go on! And recently (since Boxing Day in fact) I’ve been throwing regularly to try to re-stock on pots. Christmas was very good for me, but as a result I have almost nothing in stock except a few pots here and there. So I’m steadily working through a huge list of ‘priority pots’ (which at the moment feels like everything I’ve ever made!)

But it’s always good to try something new too; to keep things fresh. Above is a photo of a new design I made last week. I’ve always wanted to make candleholders but never seemed to get around to trying them out. So when I received a request recently for two candleholders with handles, I decided to have a go right away and made a small batch of six. I’m very pleased with them actually and they were fun to make too. I made them in one piece; a bit like throwing a lid with a knob. I threw the flat ‘saucer’ part first, leaving a lump of clay in the middle which I then pulled upwards into the candle ‘bowl’. Next day I gave the base a quick clean and added a small handle for carrying. And I’m looking forward to seeing how they come out – because I might be tempted to keep one for myself…

Thursday, 16 August 2012

Winter Landscape - Side Plates

Winter Landscape Side Plate
Back in July I was invited to take part in a promotional plate display idea as a part of UK Clay Users on Etsy. I don’t normally make plates. Large flat pieces tend to have a high mortality rate at various stages of making – they’re prone to cracking while drying or warping in the kiln, which makes them a costly item to make. However, since this was a ‘one-off’ idea, I thought I’d have a go at throwing a couple of small side plates and see how things go!

Winter Landscape Side Plate - Detail
Well yesterday I finally sent off my submission, which you can see in the photos above. This plate measures about 15cm across (or 6 inches). It’s made from stoneware clay and glazed using two different glazes: a white gloss and a blue/black glaze, which I’ve overlapped to create the idea of a landscape. The theme for the promotional idea was 'Winter' so I’ve called this one ‘Winter Landscape’. The other plate I made at the same time has been decorated using the same two glazes but with a slightly different approach. I’m planning to put this second plate into my Etsy shop available for sale in the near future.

Throwing Plates on a Bat


Freshly Thrown Plates on Bats
In the meantime though here are a couple of photos of both plates being thrown. As you can see they’re quite small – this helped to reduce the risk of cracking and warping. But it also means they’re very cute and perfect for just a couple of grapes or a snack as you can see in the last photo below!

Winter Landscape Side Plate with Grapes


Friday, 29 June 2012

Turning Pots Using Mirrors

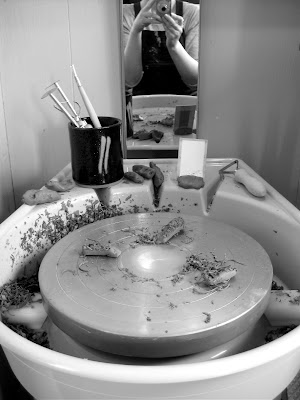
New mirror opposite wheel for turning pots
Over the past couple of weeks I’ve been trying out a new system in my studio to help me while throwing and turning pots on the wheel. I’ve had an old mirror lying around the house for years. It was taken off an unwanted wardrobe that the previous owners of our house had left behind: so you can imagine it was one of those long, tall, thin mirrors for seeing yourself full length. I had a feeling it would come in handy ‘one day’ so kept it, but hadn’t found a use for it - until now.

Recently I’ve been suffering from unexplained pain, headaches and numbness in my head and neck. A bit worrying as you can imagine, but after a couple of visits to the doctor and some serious re-assessment of my work practice, I came to the conclusion this was probably self-inflicted. I have a throwing habit that means I tend to strain my neck sideways by snapping quickly over to the right when I check the profile side of a pot. My doctor kept insisting I balance this action by checking the pot on the other side – but since there’s a wall on the left-hand side of my wheel (putting me in danger of cracking my head open) I’ve decided to ignore this suggestion entirely and instead opt for using a mirror to stop me from ‘side-checking’ altogether.


Turning pots using two mirrors
For years I used to use a small hand-mirror for throwing and turning but since I got my shimpo wheel last year I’ve dropped the habit for some reason. I know that potters are divided on the idea of using a mirror to help throw or turn. Some think using one doesn’t give a true representation of the shape of a pot and prefer the directness of seeing or touching the pot for real. I’ve always had the opinion that throwing a pot is hard enough as it is! So anything that can help or ‘ease the pain’ in the process of making a pot, is a potential tool like any other and therefore a positive thing. And after recent events I really can’t afford not to use one.

So I got the old glasscutters out and sliced my old mirror in two (it being far too tall just to lean against the wall). Luckily there was already a hole in the mirror where it used to attach to the wardrobe, and all I’ve done is screw this into the wall directly opposite my wheel. I also use my old hand mirror at a closer angle so I can get a ‘multi-mirror’ view of my pots: a bit like driving a car! Already I’ve noticed my symptoms are improving. I’m hoping that this new, safer work practice will have nipped the problem in the bud. And so far the pots are coming off the wheel quite nicely too!

Friday, 6 January 2012

All About The Making


I’ve decided that 2012 will be all about the making. It’s so easy to get sidetracked and caught-up in the other aspects of this pottery/painting lark. Admin, marketing, planning shows, queueing at the post office, buying tissue paper and scrounging cardboard boxes from local supermarkets. Sometimes it can seem like all I do is the business side of things. Of course this stuff is a crucial part of what I do and can’t be ignored. But in the meantime my poor wheel sits patiently waiting for things to calm down and for me to start making again. I won’t even mention my poor old easel…

And this explains why I haven’t blogged for four entire weeks. It’s the longest gap in posts since I began Pots and Paint back in 2009. But I decided it was good for me to ‘go dark’ for a while, gather some thoughts, and (after the rush of Christmas) concentrate on making. So here are a few photos of some recent throwing.

Above is a photo of my wheel, prepared with a wooden throwing bat, and below is a shot of me in the process of throwing. It’s a slightly staged picture because I had to wash my hands to set the camera on timer!


Above is a photo of a freshly thrown pot. As you can see, the wooden bats come right off the wheel complete with pot on top; this minimises distortion of the shape. Below is a photo of the pots a day or so later, drying. They were taken off the bats using a wire and then the bases briefly smoothed with the thumb – no turning involved. These pots are part of an order of wine carafes featuring a pouring lip at the rim. They will be fired twice and glazed all over in an ash glaze – all being well of course! When making an order it’s always best to make a few extra pots than needed in case of accidents along the way.


Anyway, I quite like the way these pots look in a small group: they remind me of penguins. And so far 2012 is shaping up nicely since I’ve been on my wheel enough times already for my back to start noticing!