Friday, 24 January 2014

New Beginnings and New Bud Vases


Yesterday I fired the first kiln load of the year! I've been busy since the beginning of January trying to make enough pots to fill a bisque kiln. It hasn't been easy, especially since the studio roof has been leaking (again!) in all this wet and windy weather. During one particularly heavy downpour, I even decided to wear my waterproofs indoors to avoid the drips... The general atmosphere has also been so damp, the pots have taken ages to dry. But, moaning about the weather aside and despite everything, I managed to get the kiln going yesterday for my first bisque - and so today (while I'm waiting for the kiln to cool down) I thought I'd blog about some new pots I've been making.


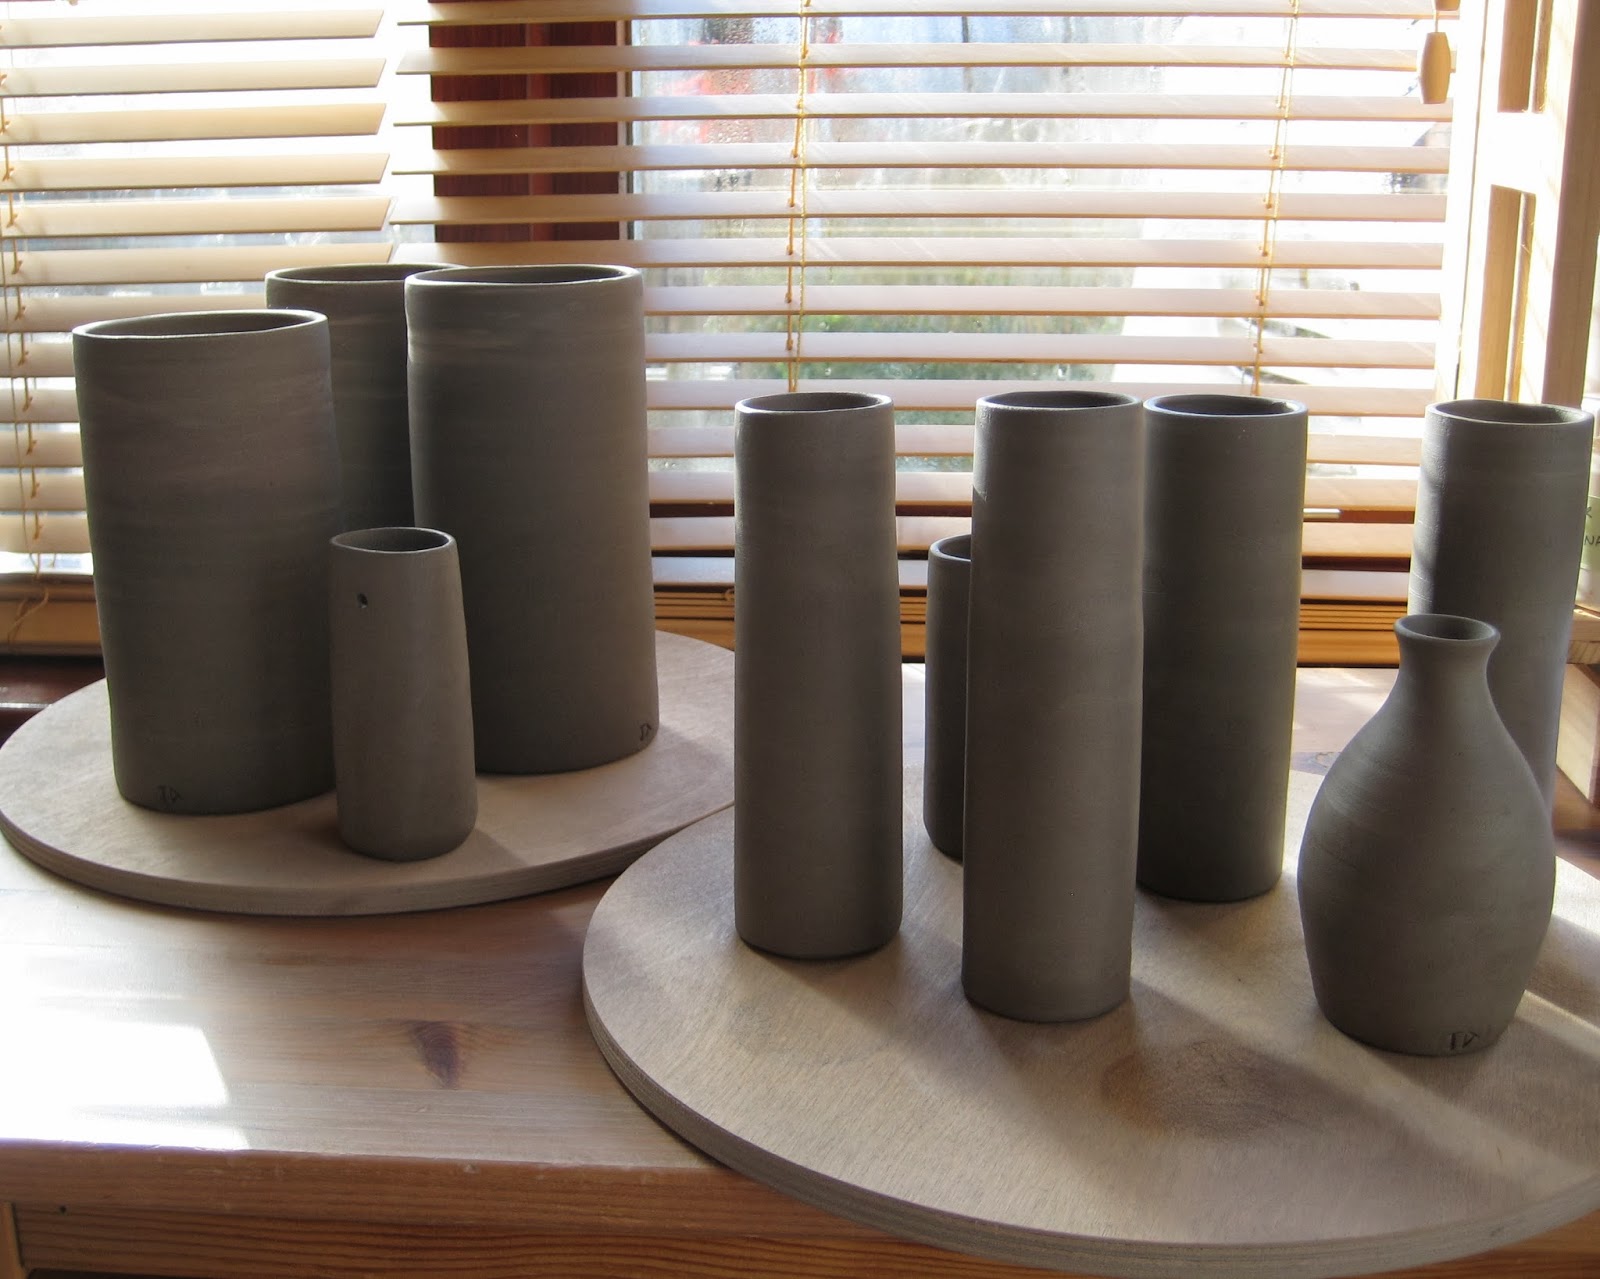
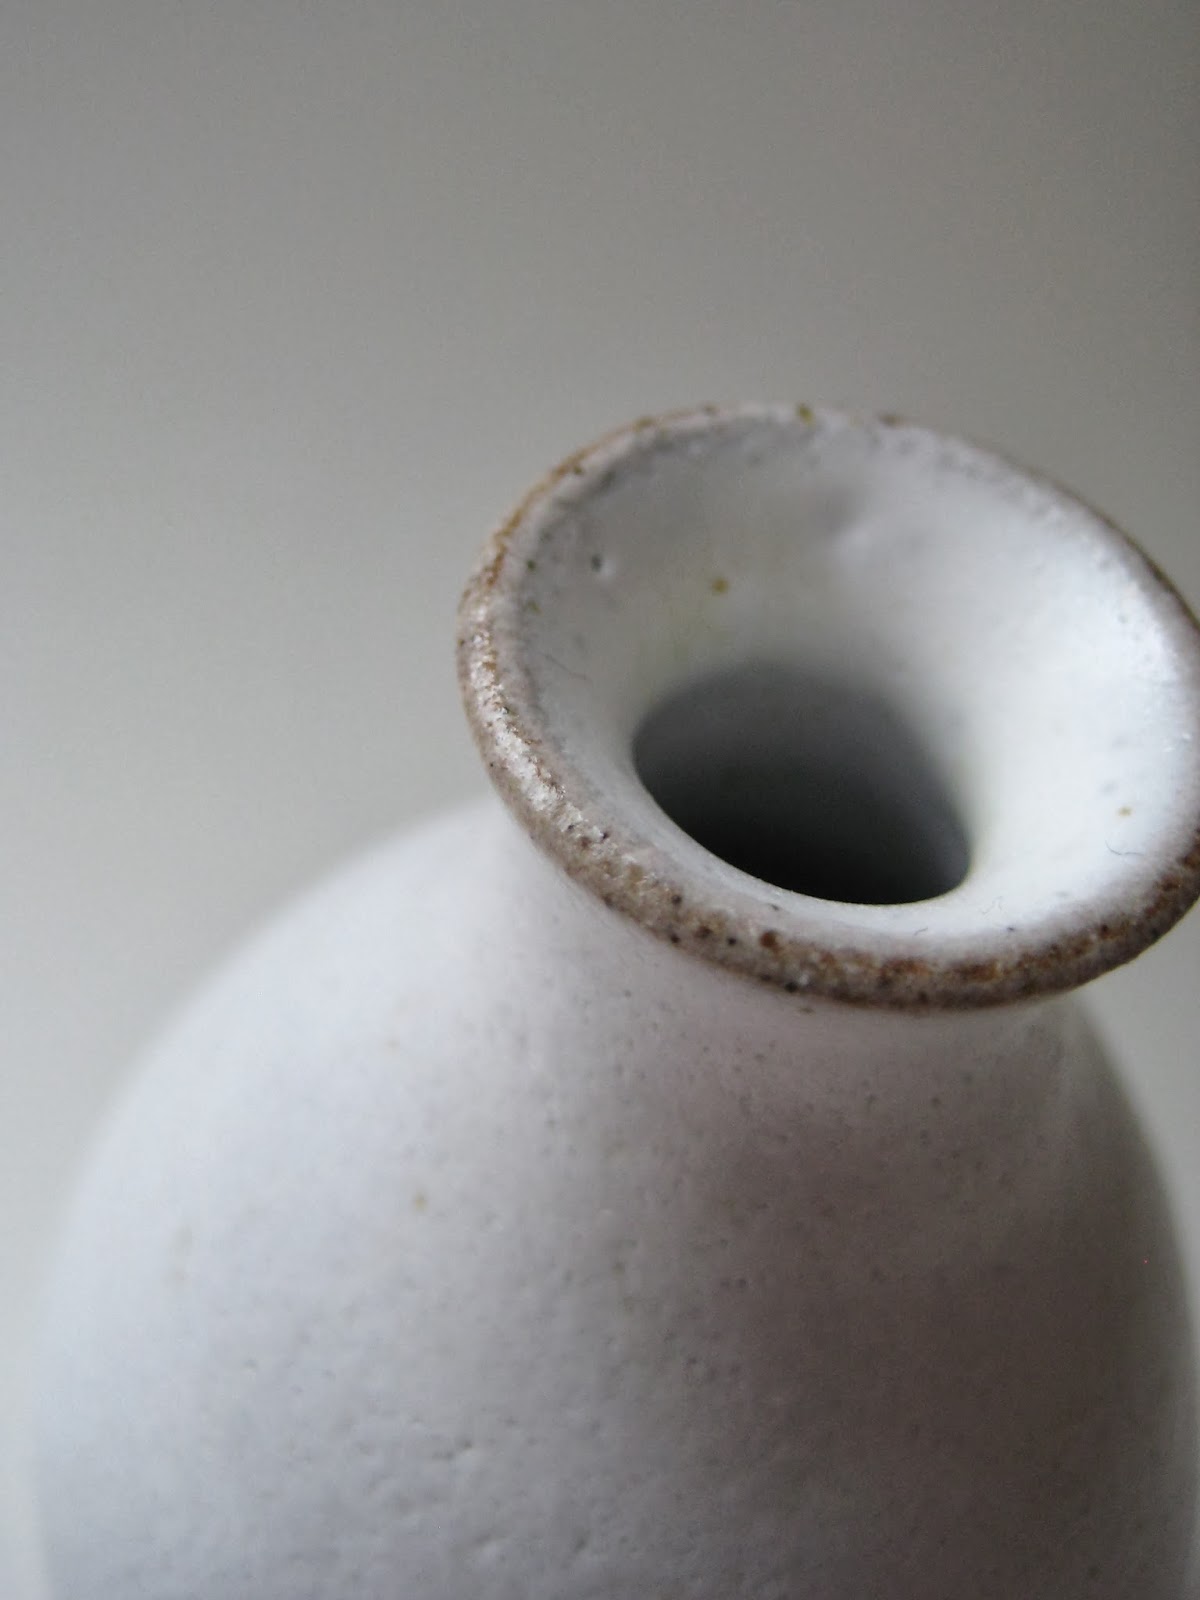
Before Christmas I started to throw a few new vase shapes. I wanted to make some small bud vases with a belly form and also some straight slim and narrow 'stem' vases. Above is a photo of the first small test batch I made before Christmas (shown in leatherhard stage and drying out). They're all hand-thrown as usual, but the straight narrow vases have been thrown in two parts: two thrown 'tubes' which are then spliced together when they're both leatherhard. This sort of making is called composite making, and it's something I've started to experiment with. It's especially useful for making taller pots and for making narrow forms (for when your fingers can't fit inside the pot during throwing).


I've started to list a couple of these finished pots in my Etsy and Folksy Shops - and hope to add the rest in the coming weeks. All being well, there should also be more narrow vases in the same style from this first bisque kiln - once I've glazed them and fired them again of course. But I'm very pleased with this first selection and I'm looking forward to developing the theme further this year. Hopefully it's going to be a great new year with lots of new pots!


Thursday, 5 December 2013

Christmas Bells and Chimes


For this Christmas season I wanted to try some new decoration ideas. Coming up with ideas that feel new and fresh isn't always easy. Sometimes it can feel like everything's been done before - and it's tempting to just dust off the remainder of last year's stock and hope no one will notice! So to look for inspiration I thought back to more traditional Christmas themes - and struck upon the idea of bells.

Bells used to feature much more in Christmas decorations than they do these days - or at least so it seems. Along with candles, yule logs and ivy. But rather than just make some decorations in the shape of a bell, I decided to make the actual bells themselves. 

Each bell is hand-thrown 'upside-down' just like a small deep bowl. Then the 'bases' are turned and rounded off to form the top of the bell cup. I decided to add small hook handles on each of the bells. This gives them flexibility; they can either be rung by hand as handbells or hung up by a cord to chime in the breeze.

I'm very pleased with the results. Each bell is one of a kind - each slightly different in shape, glazing combinations or handle style. And of course each bell chimes differently too! I think they make lovely gifts - and the best thing about them is, that they're not just for Christmas. They're perfect for decorating the home all year round and even for the garden in Summer too.

Available now in my Folksy Shop and Etsy Shop

Thursday, 3 October 2013

How to Make a Wood Ash Glaze

Glaze Mixing
Over the summer I've been doing lots of glaze testing, and one of these has been to find my own Wood Ash Glaze recipe. It's not an easy process. I gathered together several recipes found in pottery books. All of them had a different take on the process - and sometimes conflicting ideas! I tried out four of the recipes with varying success, but now I think have my own version.

Wood Ash

The first thing I had to do was get a source of wood ash. You need at least a kilo of good grey/white ash with as little rubbish in it as possible: the sort you get after a long hot fire. Luckily my sister happened to have some. This came from a mixture of wood species (Cherry, Eucalyptus and general woody plants from the garden) that had been pruned and burned over the previous summer in a chiminea. This meant the ash was very clean and without contaminants like soil, which you might get from a ground fire. Anyway, my sister had collected all this ash in a bucket with the intent on using it to mulch the raspberries; but instead I jumped in and she very kindly let me have it!

First of all I had to clean the ash. This I did by sieving it to get rid of any last bits of twig, stone, carbonised lumps, leaves etc. I sieved it twice using the same sort of sieve as a normal kitchen/household size rather than a glazing sieve: and I wore gloves, goggles and a mask by the way as this stuff isn't too good for you if inhaled. The photo above shows the powder that was left. As you can see it looks very clean. I decided it looked good enough to use just as it was. Many books talk about washing the ash by soaking it, rinsing it and then drying it back to a powder. But this sounded obsessive and unnecessary to me! Instead I decided to use this powder as the dry ingredient in a recipe like any other.

Sieving The Glaze

After lots of little test batches, I decided on my final recipe. This is based on one found in Stephen Murfitt's The Glaze Book. The main ingredients are:

Wood Ash 38
Feldspar 30
China Clay 20
Flint 12

Although I've also added a percentage of Red Iron Oxide. 

After measuring out the ingredients precisely using an electronic scale, I put everything straight into a bucket of water. Then stir! Simple really. Although it would be if I wasn't wearing goggles, a mask and gloves (the donning of which always seems to bring on fits of sneezing...) The pictures above show just a few stages of making up the glaze mixture, which include sieving it at least three times using a 60 mesh glazing sieve. The result is the lovely rose-pink colour of the raw glaze mixture in the last photo.

Dipping Pots

And then it's just a matter of glazing some pots. Above are a couple of photos showing me dipping a jug into the freshly made Wood Ash Glaze. And below are some photos of the latest batch of pots in their raw glazed state, ready to be packed into the kiln...

Jug with Wood Ash Glaze
Glazed Pots Waiting for the Kiln


At the moment I have no idea if these pots have worked. As I type, I'm actually waiting for the kiln to cool down enough so I can open it and see the final results. It's a bit of a nervous waiting game: it could go either way. Below is a test tile of what the glaze looked like during the testing stages. As you can see, it's a very nice simple wood ash glaze fired in an electric kiln. But tests are only tests, and glazes can behave completely differently when put on a pot. So we'll just have to wait and see...

Wood Ash Glaze Test Tile


Saturday, 14 September 2013

Garden Labels: Ceramic Plant Markers


Talking of gardens...! My last blog post was all about my wild flower meadow garden. But I forgot to mention I also grew a few herbs this summer too: some thyme, lavender, mint and marjoram. These I grouped together in pots on the patio. As I was planting them out it crossed my mind that the perfect finishing touch to set them off would be some plant name tags. And this inspired me to make a set of ceramic herb markers - an obvious idea really!

As you can see, they're a simple rustic design. I made them using stoneware clay and some letterpress stamps which I pressed into the clay when still soft. I selected ten of the most common garden herbs and used a plain white glaze to highlight the lettering. They should be quite hard-wearing even in cold weather - and reusable of course. And they look so pretty against different shades of green foliage. 

You can see a listing for these markers in my Etsy shop. I'm hoping a few gardeners will like them, and I think they make a lovely gift set too. I'm planning to make more markers with the names of popular vegetables and summer salads on them as well. All of this is probably a bit summery just as autumn comes around the corner. But autumn is also a time for shed-clearing, seed-buying, tool-cleaning and general garden planning of next year's crop - so I'm just way ahead of myself for once!